Generation Why? - Part 2

10398452_624382859646_3990759_n.jpg

In the last article, we discussed the often maligned generation Y(generation why?). The act of questioning methods and processes can actually advance our cause in technical rescue. This can be achieved with questioning, critical thinking, and constructive debate. In Part 2 we will explore some "why's?" that may close capability gaps or even get people's blood pressure up. We will not cover each of these issues exhaustively, but may revisit some of them in the coming months. So let's fire the first shot... Have you evaluated your rescue practices and do you understand why you are doing the things that you do?

Why do some practitioners insist on tying a safety or back-up knot in the figure-eight family and some other knots? An overhand safety in the running part of the rope over the standing part does not get actuated. It takes more time to tie the knot properly. It requires some to untie and re-tie to get the tail length correct. Strength is not added to the figure eight with a safety. I have seen people even load the safety side of the knot when tied in the middle of a rope?! Perhaps we should focus on the knot having low gain and being dressed and tied correctly.

Why does the Bowline family of knots get so beat up and ostracized by parts of the rescue community? With the addition of a Yosemite Finish, a double-overhand bend, or slight modification of the knot (double loop / high strength), the bowlines can be reliable, strong, and easy to untie.  There are so many varieties of the knot that they can be tied into multi-point anchors, tied in-line, hard-tied into a fixed rope system, and many others.


Do you use a Munter Hitch as a progress capture? Will the “Whistle Test” deter you from using this method?

Why does the Munter Hitch get such a bad rap?

Whistle test? -Perhaps not. Two-person load? –Absolutely. We catch 600-800 lb. loads all the time using the Munter Hitch. The key to success is that the operator must manage slack and plan for some type of edge friction into the system. We use one change-of-direction carabiner. As for the whistle test- what happens if your Engineer is going code-3 into a curve and let’s go of the wheel or has a heart attack? Does the whistle save your people?  Should we back-up our drivers with safety-drivers? Or maybe take two SCBAs in a fire. I like many devices and tools out there, but the Munter Hitch has no cost, can catch big loads, can act as a Progress Capture Device, and facilitate twin-tensioned systems in lowering and hauling applications.

I know everyone in US&R has cut-off saws that will allow you to cut just under 5” of depth. Have you ever heard of, or tried a ring saw?  As technology improves why has a ring saw not made it into your cache yet? You can achieve 10” of cut depth on a platform that runs on gasoline or hydraulic power.  It might really save a team a good amount of time on the dreaded step cut. On a similar note, why is your team only sporting the 27” long Petrogen Torch that comes in the US&R Ensemble but train and work cutting in confined areas such as a 36” culvert. Thirty inches of torch in a 36” of culvert is unwieldy. Why has your team not looked into the 7” Breaching Torch that Petrogen manufactures.  It has a 45-degree head rather than the 90-degree.  It might be a handy enhancement to your cache when you are tunneling through rebar like pick-up-sticks. How about- Why is the central mode of operations, in training and response, of some overland SAR teams a grid search? With training organizations like NASAR; and programs like FUNSAR, SARTECH Exams, and Managing the Lost Person Incident, there are too many better uses of resources than walking a dress-right-line in the woods. Save that for thorough secondary and tertiary searches or when a rescuer loses his flashlight or keys.  Rapid / hasty searches, hailing searches, trailing / tracking, qualified canine assets, and technical search assets are all better options and require diligent practice and training. Active searching and following a heading are day-one skills. Modern searches even use victim profiling and actuarial tables to predict traits and behavior. Have you heard about aerial drones in SAR? Let’s elevate our profession by incorporating modern and practical methods.

"Would you perform a VEIS operation if a mother was screaming her child was in the living room? If so, what constitutes untenable conditions for your dept. at a Confined Space call?"

Why are we trained to perform a Vent-Enter-Isolate-Search (VEIS) operation with a confirmed child in a working house fire, but we do not enter a confined space with a patient guppy-breathing until it is too late? Firefighters will even circumvent two-in-two-out to save a life in a fire. Permitted Confined Space: a confined space with possible mechanical hazards, low oxygen, electrical hazards, flammable atmospheres, and other such hazards. In fires these hazards are not only a possibility, but rather a certainty. In the VES operation we mitigate these with turnouts-for flash protection, SCBAs for respiratory protection, helmets and PPE for mechanical protection, and speed to reduce time in the hazard space.  So why could rescuers not use the same ensemble with the addition of PH-Paper to perform grab-and-go rescues for the guppy-breather in the confined space or even trench realm? Especially if the company officer and competent person can reason that other potential hazards seem manageable. In-and-out. Grab-and-go. Arbitrary fast turnaround.  We make OSHA exceptions on the fireground. We are trained to risk allot to save allot. The last why for us to think hard on is- Why did Special Operations stop being special? A very basic Rescue Specialist will at least be up to speed in nine areas: EMS, Hazamt, Rope, Water, Wilderness, Confined Space, Vehicle & Machinery, Trench, and Structural Collapse.  Staying on top of these can be a full time job. Trust me. So why do Chiefs and Emergency Managers seem to think anyone can do these things? They put unqualified people on specialized rescues and teams. Everyone deserves to be saved. Our customers deserve a second chance at life. The people we are sworn to protect.  Think about your family or kids- do you want the best for them? I do. Why people in high places cannot see this- I don’t know.  People have opportunities to take classes.  Virtually all 1006 rescue and 472 hazmat classes are free in my state.  There is a huge distinction between certified and qualified. I would only trust a small percentage of the students that come through our rescue programs to do the job at the level that the people we protect deserve.

Special Operations participants should be vetted, interviewed tested, refreshed annually, and mentally / physically fit for duty.  The percentage of the general population in emergency services, that can perform at this level, is small. Think -FBI HRT, Secret Service CAT, Army Rangers, Coast Guard AST swimmers, Air Force PJs, etc.   I would say somewhere in the realm of 3%, in my state, are guys I’d want responsible for my family at a technical incident. Instead team participation and training are used as political poker chips and virtual entitlement programs for the masses. It takes decision makers that have really done the job to empathize with the rescuers and the people being rescued.  The they  will tell you- “Oh I took the class. It was tough. It was hot. I know how it is. . . “ This is not so. The guy that acts like that guy would probably risk more for his next promotion than he would for a child in a raging creek. That’s no the heart of a real Special Operations rescuer. Rather, they strive to be humble, consummate, professionals. Their calling is tradecraft and a source of pride. They are courageous and daring, not recklessly so, but because of the operators next to him, on his team. Their confidence comes from years of training and experience and the knowledge that the guy next to him would risk all and do all for the team and the people we serve.

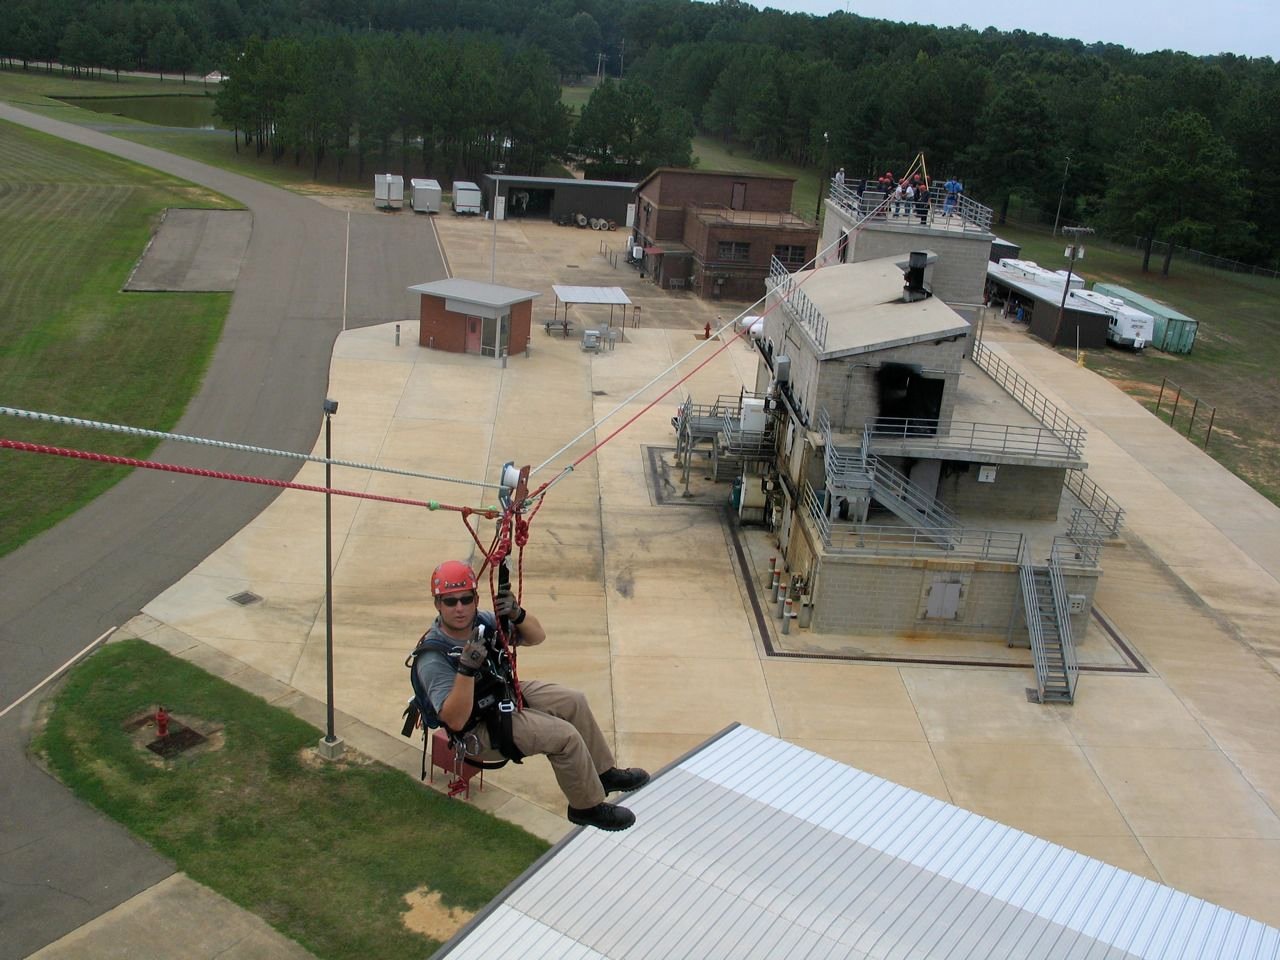
Highline Operations The last one was long, but perhaps touches all of us in this field. It is important to use the knowledge and critical thinking responsibly. You will encounter closed minds and we are obligated to honor SOPs / SOGs within our teams and departments. In closing I would like to reiterate: do not accept old ways and the status quo blindly. Take courses, books, instructors, and check the facts. Conduct equipment trials and firehouse experiments. Try new methods and put the issues in the spotlight. Continue to ask why- just do it in the right way. Quietly and humbly enjoy the wins. Take your losses on the chin and sleep well knowing that you know the answer from firsthand experience.

For a downloadable/printable pdf version of this article click here.

Generation Why? - Part 1

IMG_1301.jpg

I have heard people in fire and rescue refer to Generation Y, as “generation why?” Sometimes these statements would come down in condescending ways from senior officers on the department.  It was usually in reference to the Generation Yer’s asking why a job needed to be done.  At least in my case, the senior guys typically misunderstood my intentions. What I was actually doing, instead of complaining or being insubordinate, is trying to understand the end goals and purpose of a job-so as to maximize the outcome and efficiency.  We are the generation that changes their email passwords on Outlook, help insert functions into Excel, and a host of other daily tech solutions- so maybe we can come up with a better way, faster way, or more positive outcome. –But not necessarily by blindly following orders. In other words- asking why is not a bad thing. In fact, its what I contend rescuers should do more often.

Generation Why Firefighters

Generation Y is generally considered to be those born during the 1980’s and early 90’s. Stereotypes for Generation Y include laziness, a sense of entitlement, and requiring praise. In actuality this demographic is very “tech savvy” (think gear), ambitious, family oriented, and are team players with good communication skills. The latter are desirable characteristics, but the “why” and the questioning is a characteristic that should transcend all generations on the job. So let’s set the stage for this reasoning. . .

Question Everything! Consider that an order. Not at the wrong time. Not during an emergency. Not in an insubordinate or disrespectful way. Remember your station in the department and be always humble. Asking why we do something is the first step in understanding SOP/SOGs, our history and the mechanics of the problem. I have little patience or regard for statements like “Because we have always done it that way,” “Just because I said so,” The words “always” and “never” used too liberally in rescue. And finally the perpetual get-out-of-jail-free words. . . “for safety” -without due explanation.

Meaningful questioning elevates rescuers to a world of critical thinking. Critical thinking is defined as "the process of actively and skillfully conceptualizing, applying, analyzing, synthesizing, and evaluating information to reach an answer or conclusion" and also "disciplined thinking that is clear, rational, open-minded, and informed by evidence"(dictionary.com). Our end goal is to improve the mission to save those that others cannot, all-the-while keeping our rescuers as safe as is prudent. To accomplish this we must continually evaluate and ask “why do we do the things we do?” and “how can we improve our mission?”

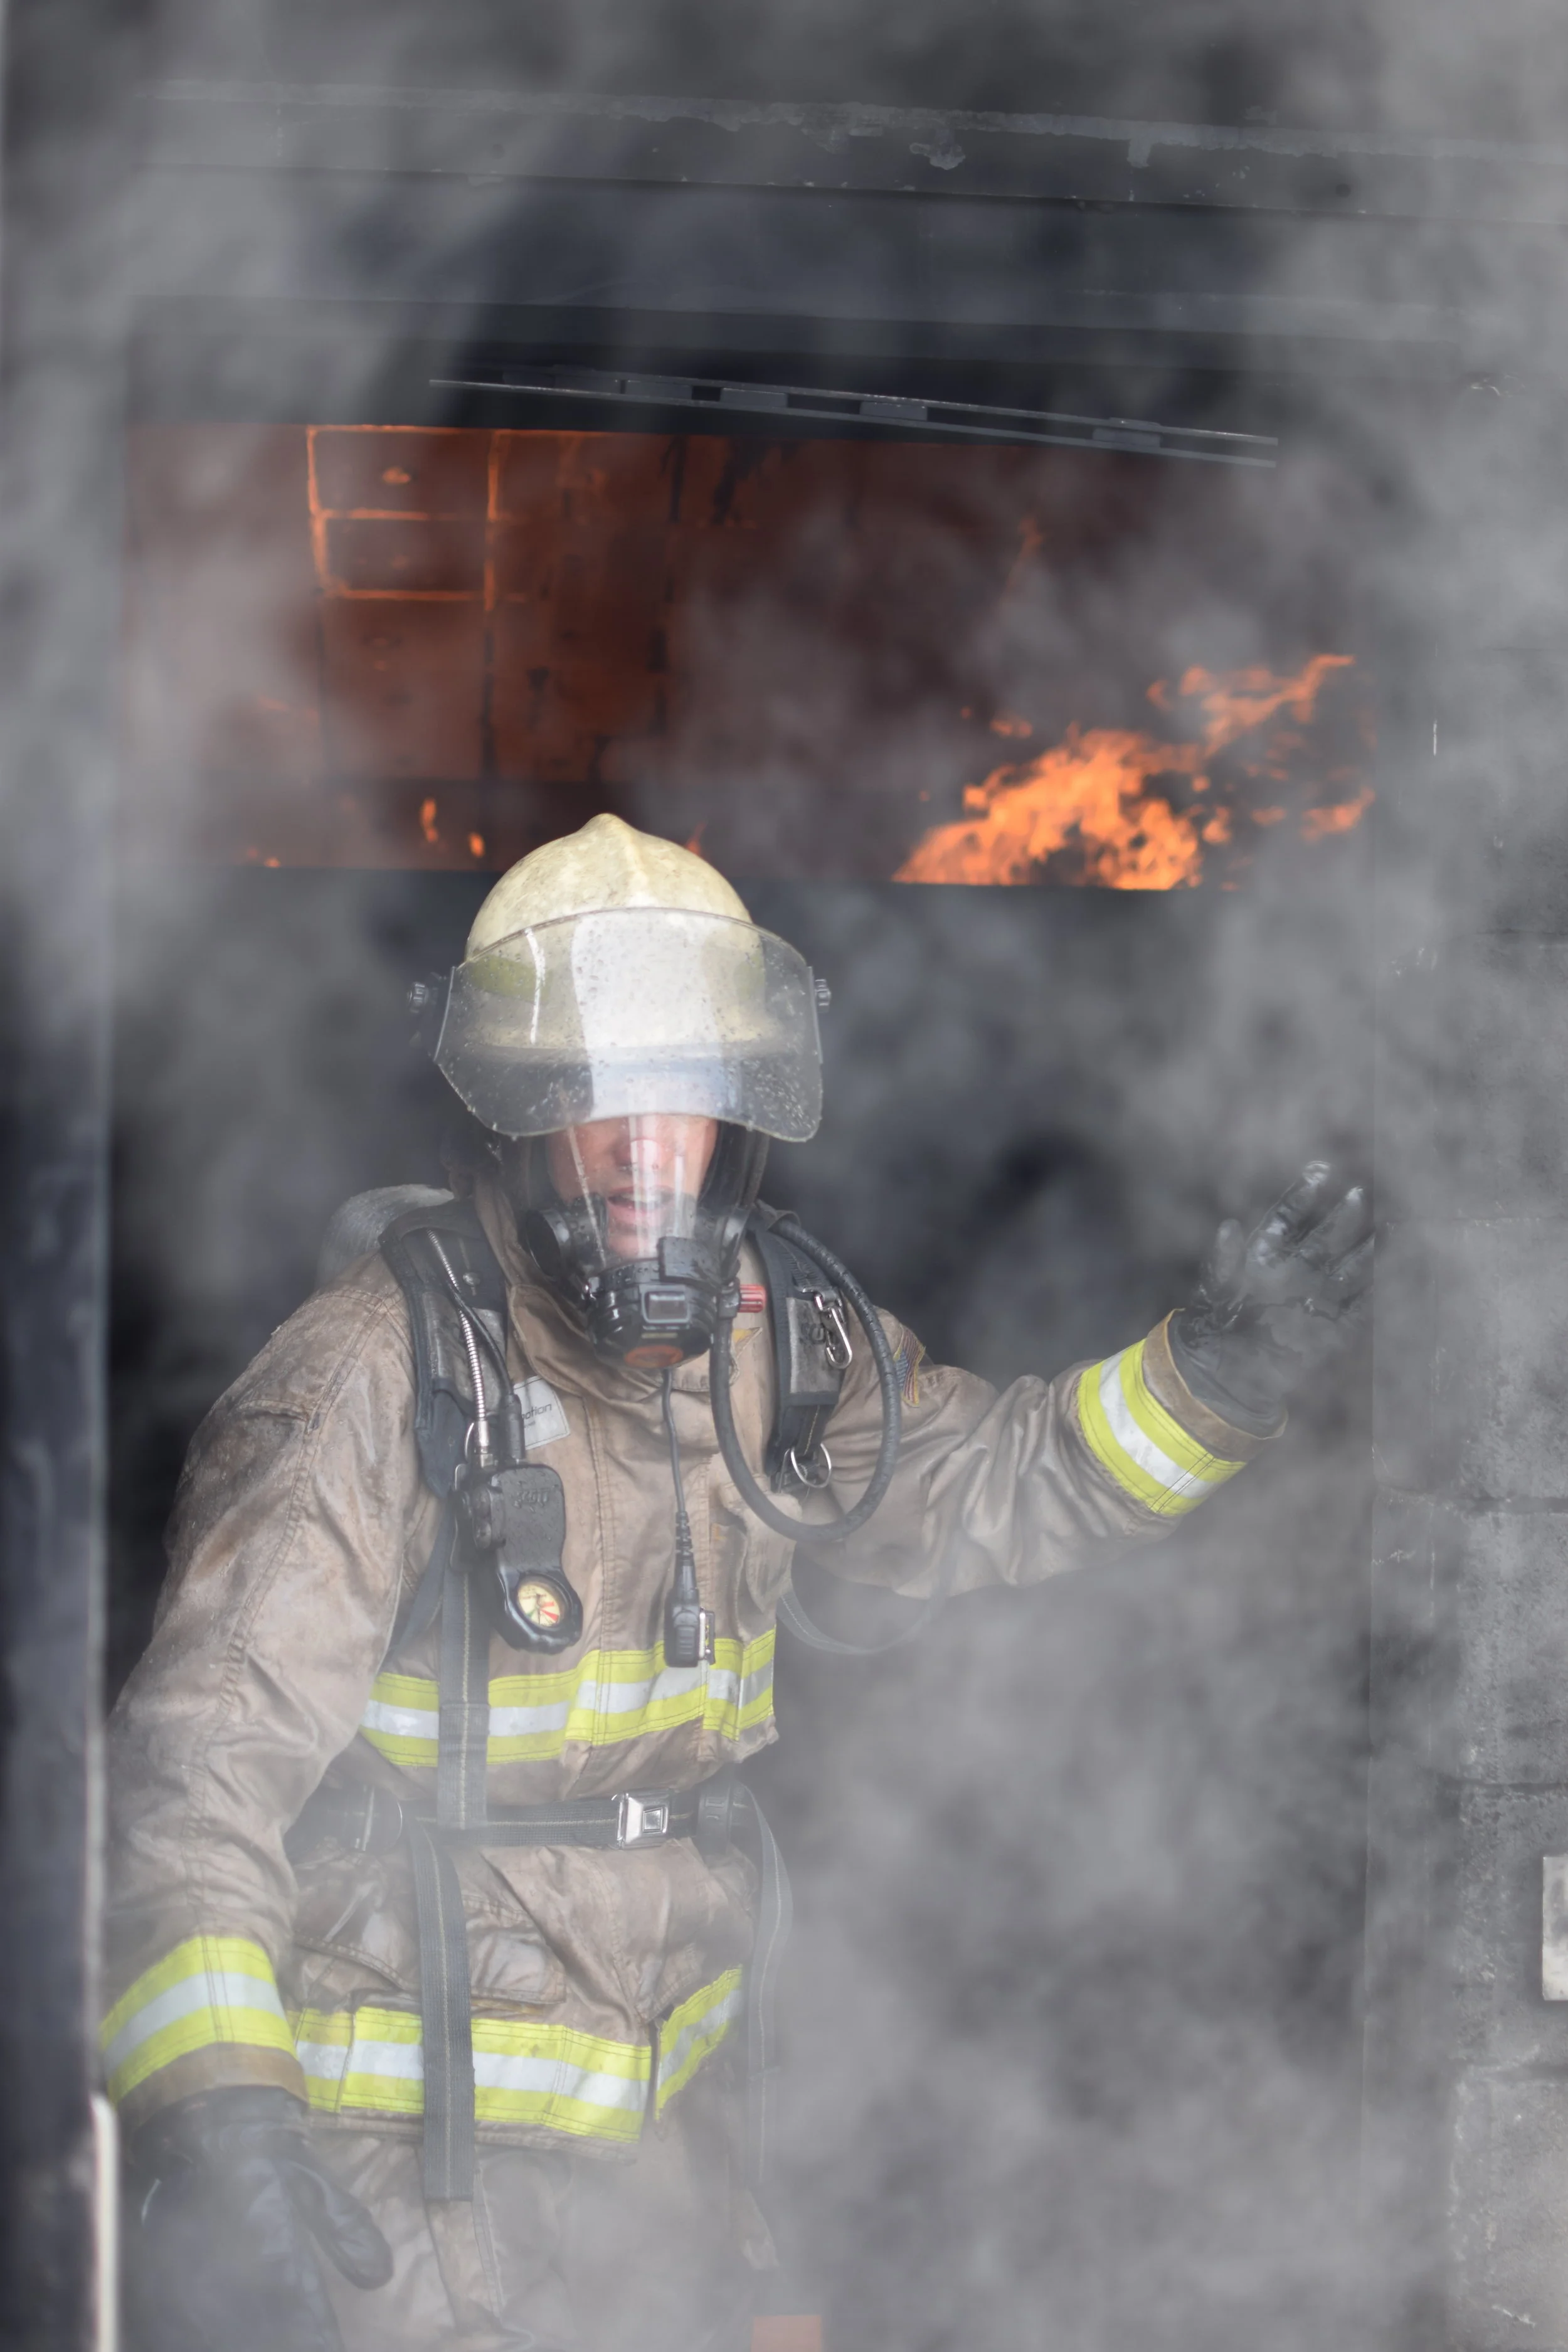
Firefighter Making Entry

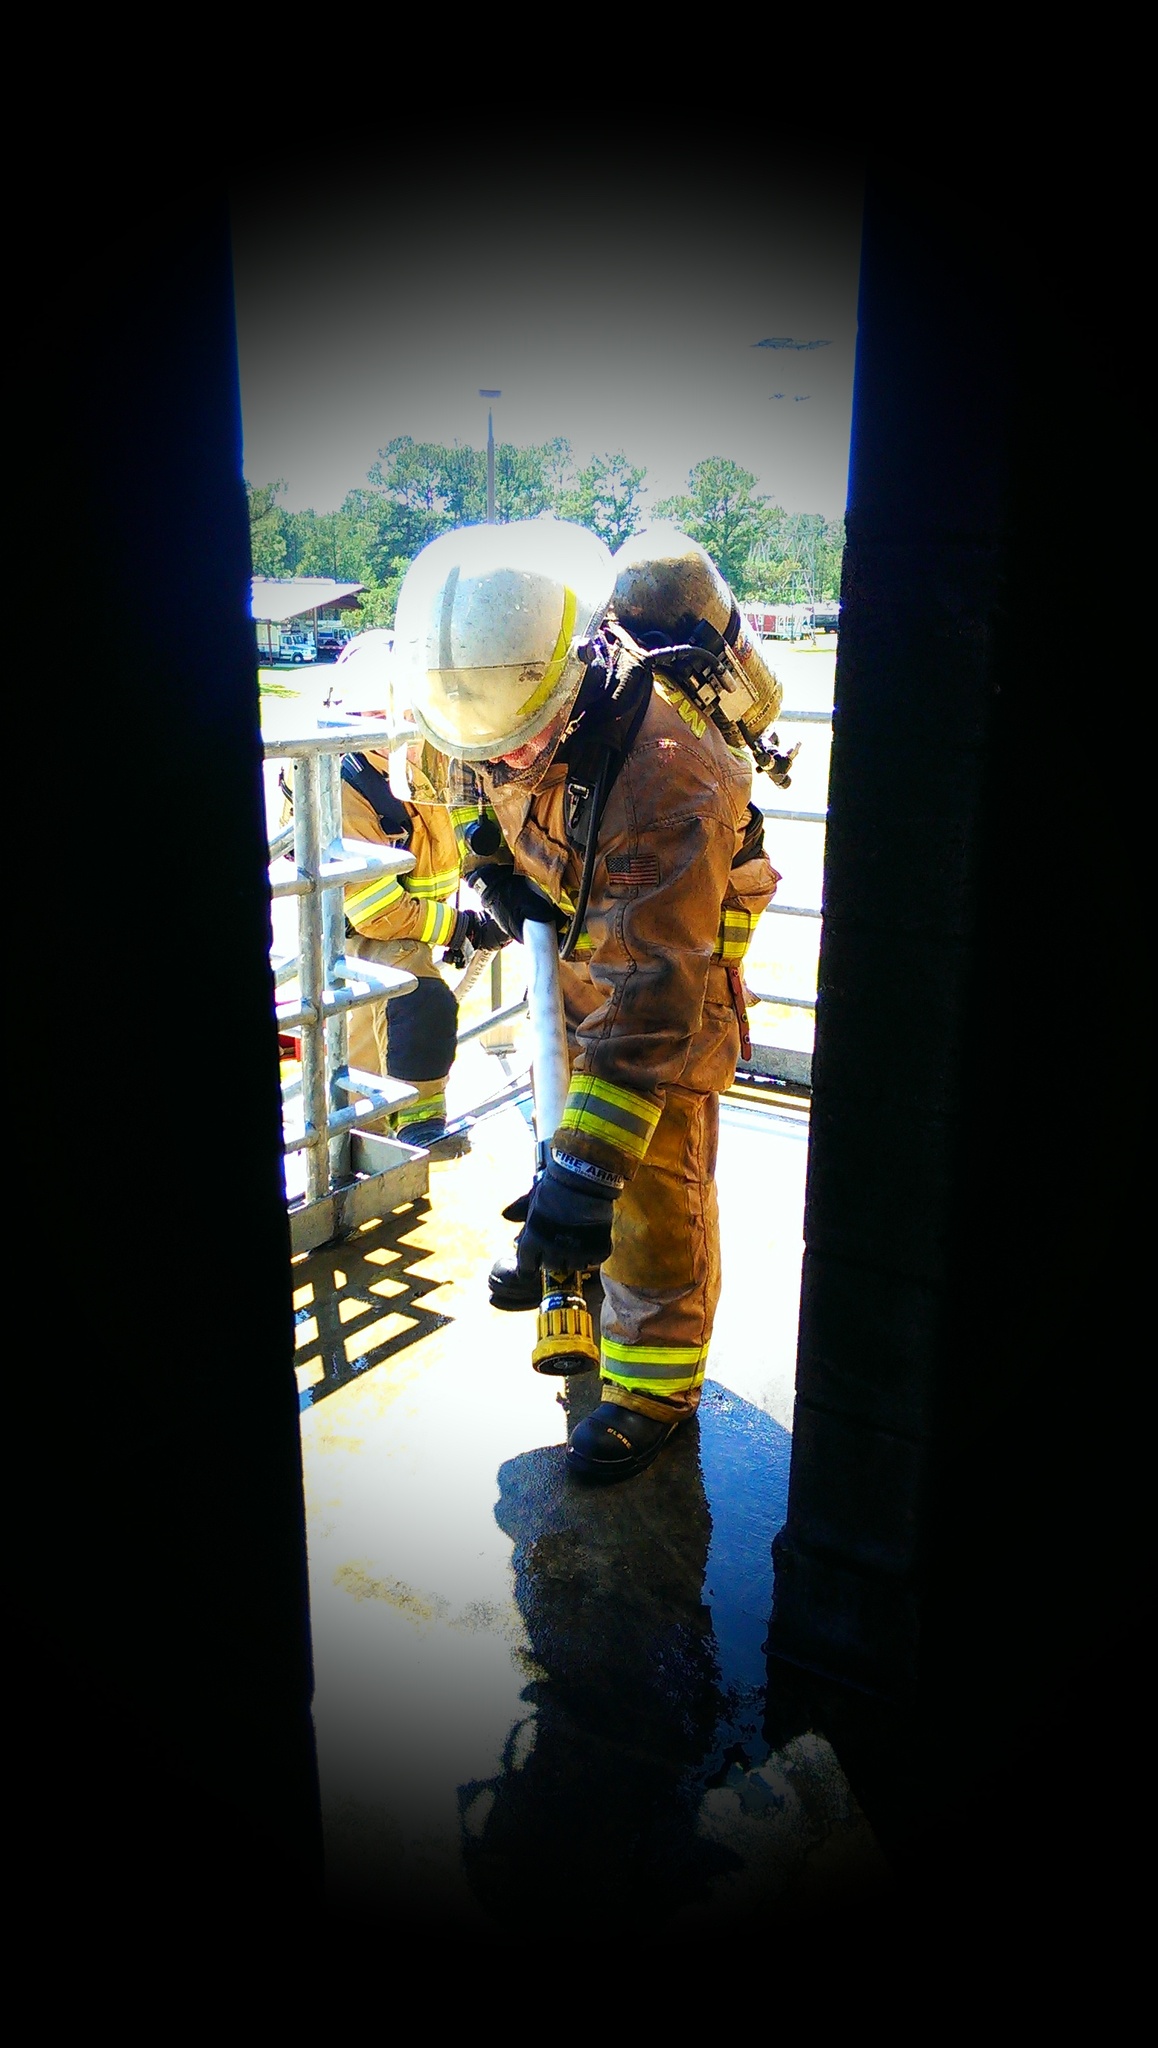
There are answers out there. Rescuers must seek them out.  One might start at the station or home front. The next source may be on the web, in books, or videos.  Let’s also focus on the instructors:  if your instructor cannot satisfactorily answer “why,” then you need to find a new one or seek knowledge elsewhere. There are allot of hacks and parrots out there that are mass-produced and label themselves instructors.  Instructors aren’t supposed to know everything, but a good one will admit that, and know how to find the answer to your question.

In the next article, we will examine some rescue "why's?" that will generate some spirited debate around the day room. We won't cover each topic exhaustively, but we will open the door to some research and critical thinking.

You can download or print a PDF copy of this article by clicking here.

Can You Push Fire? YES!

Screen-Shot-2014-07-27-at-7.35.28-PM.png

I can't tell you how many people I have heard say "You can't push fire, they proved it". Well they (NIST and UL) produced an incredible amount of research for firefighters to use in order to make conditions safer and tactics more effective. I have seen countless firefighters throw around the "push fire" term as if it were a catch phrase. The fact of the matter is that an inappropriately used hose stream can and will "push" fire. Now, I know many of you are thinking that the hose stream isn't pushing the fire and that I am wrong in saying that. Well, call it what you want but a hose stream can manipulate the flow paths that we are talking about and whether you believe the stream itself is moving the fire or the influence of that stream is changing the flow path, both cause the fire to migrate to other areas. In my next few articles I will be showing you some videos I am putting together about nozzle selection and the effects of fog nozzles, smoothbore nozzles and their uses. Until then watch the video below and you answer the question "Can you push fire?".  

If you have watched the above video and still think we cannot push fire with a hose stream then what would you call it? We can argue that the "Water" isn't pushing fire and I completely understand that debate. However, if we continually tell new firefighters that water cannot push fire then we are leaving out a massive amount of information that they need to know. I believe it is much more important for us to agree that using our nozzles incorrectly can contribute to fire migrating to other areas of the structure than to say that it doesn't and that the change in ventilation or flow path is what caused it.

I will spend much more time in the coming articles explaining the movement of air with nozzles, pressurization of spaces with nozzles and the relationship between GPM, Nozzle Reaction, Heat Absorption, and the advantages and disadvantages of the smoothbore nozzle and the fog nozzle.

Hand Method for Friction Loss

Screen-Shot-2014-06-30-at-3.31.27-PM.png

In my last article, I talked about memorization as a method for figuring friction loss on the fire scene. In this article we will talk about another fire ground method… the hand method. This method requires a little bit of arithmetic that can become confusing in stressful situations. However, it still is a simple method that can be easily mastered. There are a lot of extremely good pump operators out there that prefer this method. It is similar to the memorization method, in the sense that we will be talking about 1 ¾ diameter hose and all friction loss is figured in 100 feet hose lengths. One major difference between the two is the fact that the memorization method is exact and the hand method is not. It will be plus or minus a couple of psi every time you figure it, but differences will be minuscule and you will probably never find them on the pump panel. Keep in mind this is still just friction loss. You will still have to add your nozzle pressure in order to get your pump discharge pressure. We have provided a training video below but if you continue reading we will go into detail about how to use the Hand Method for calculating friction loss.

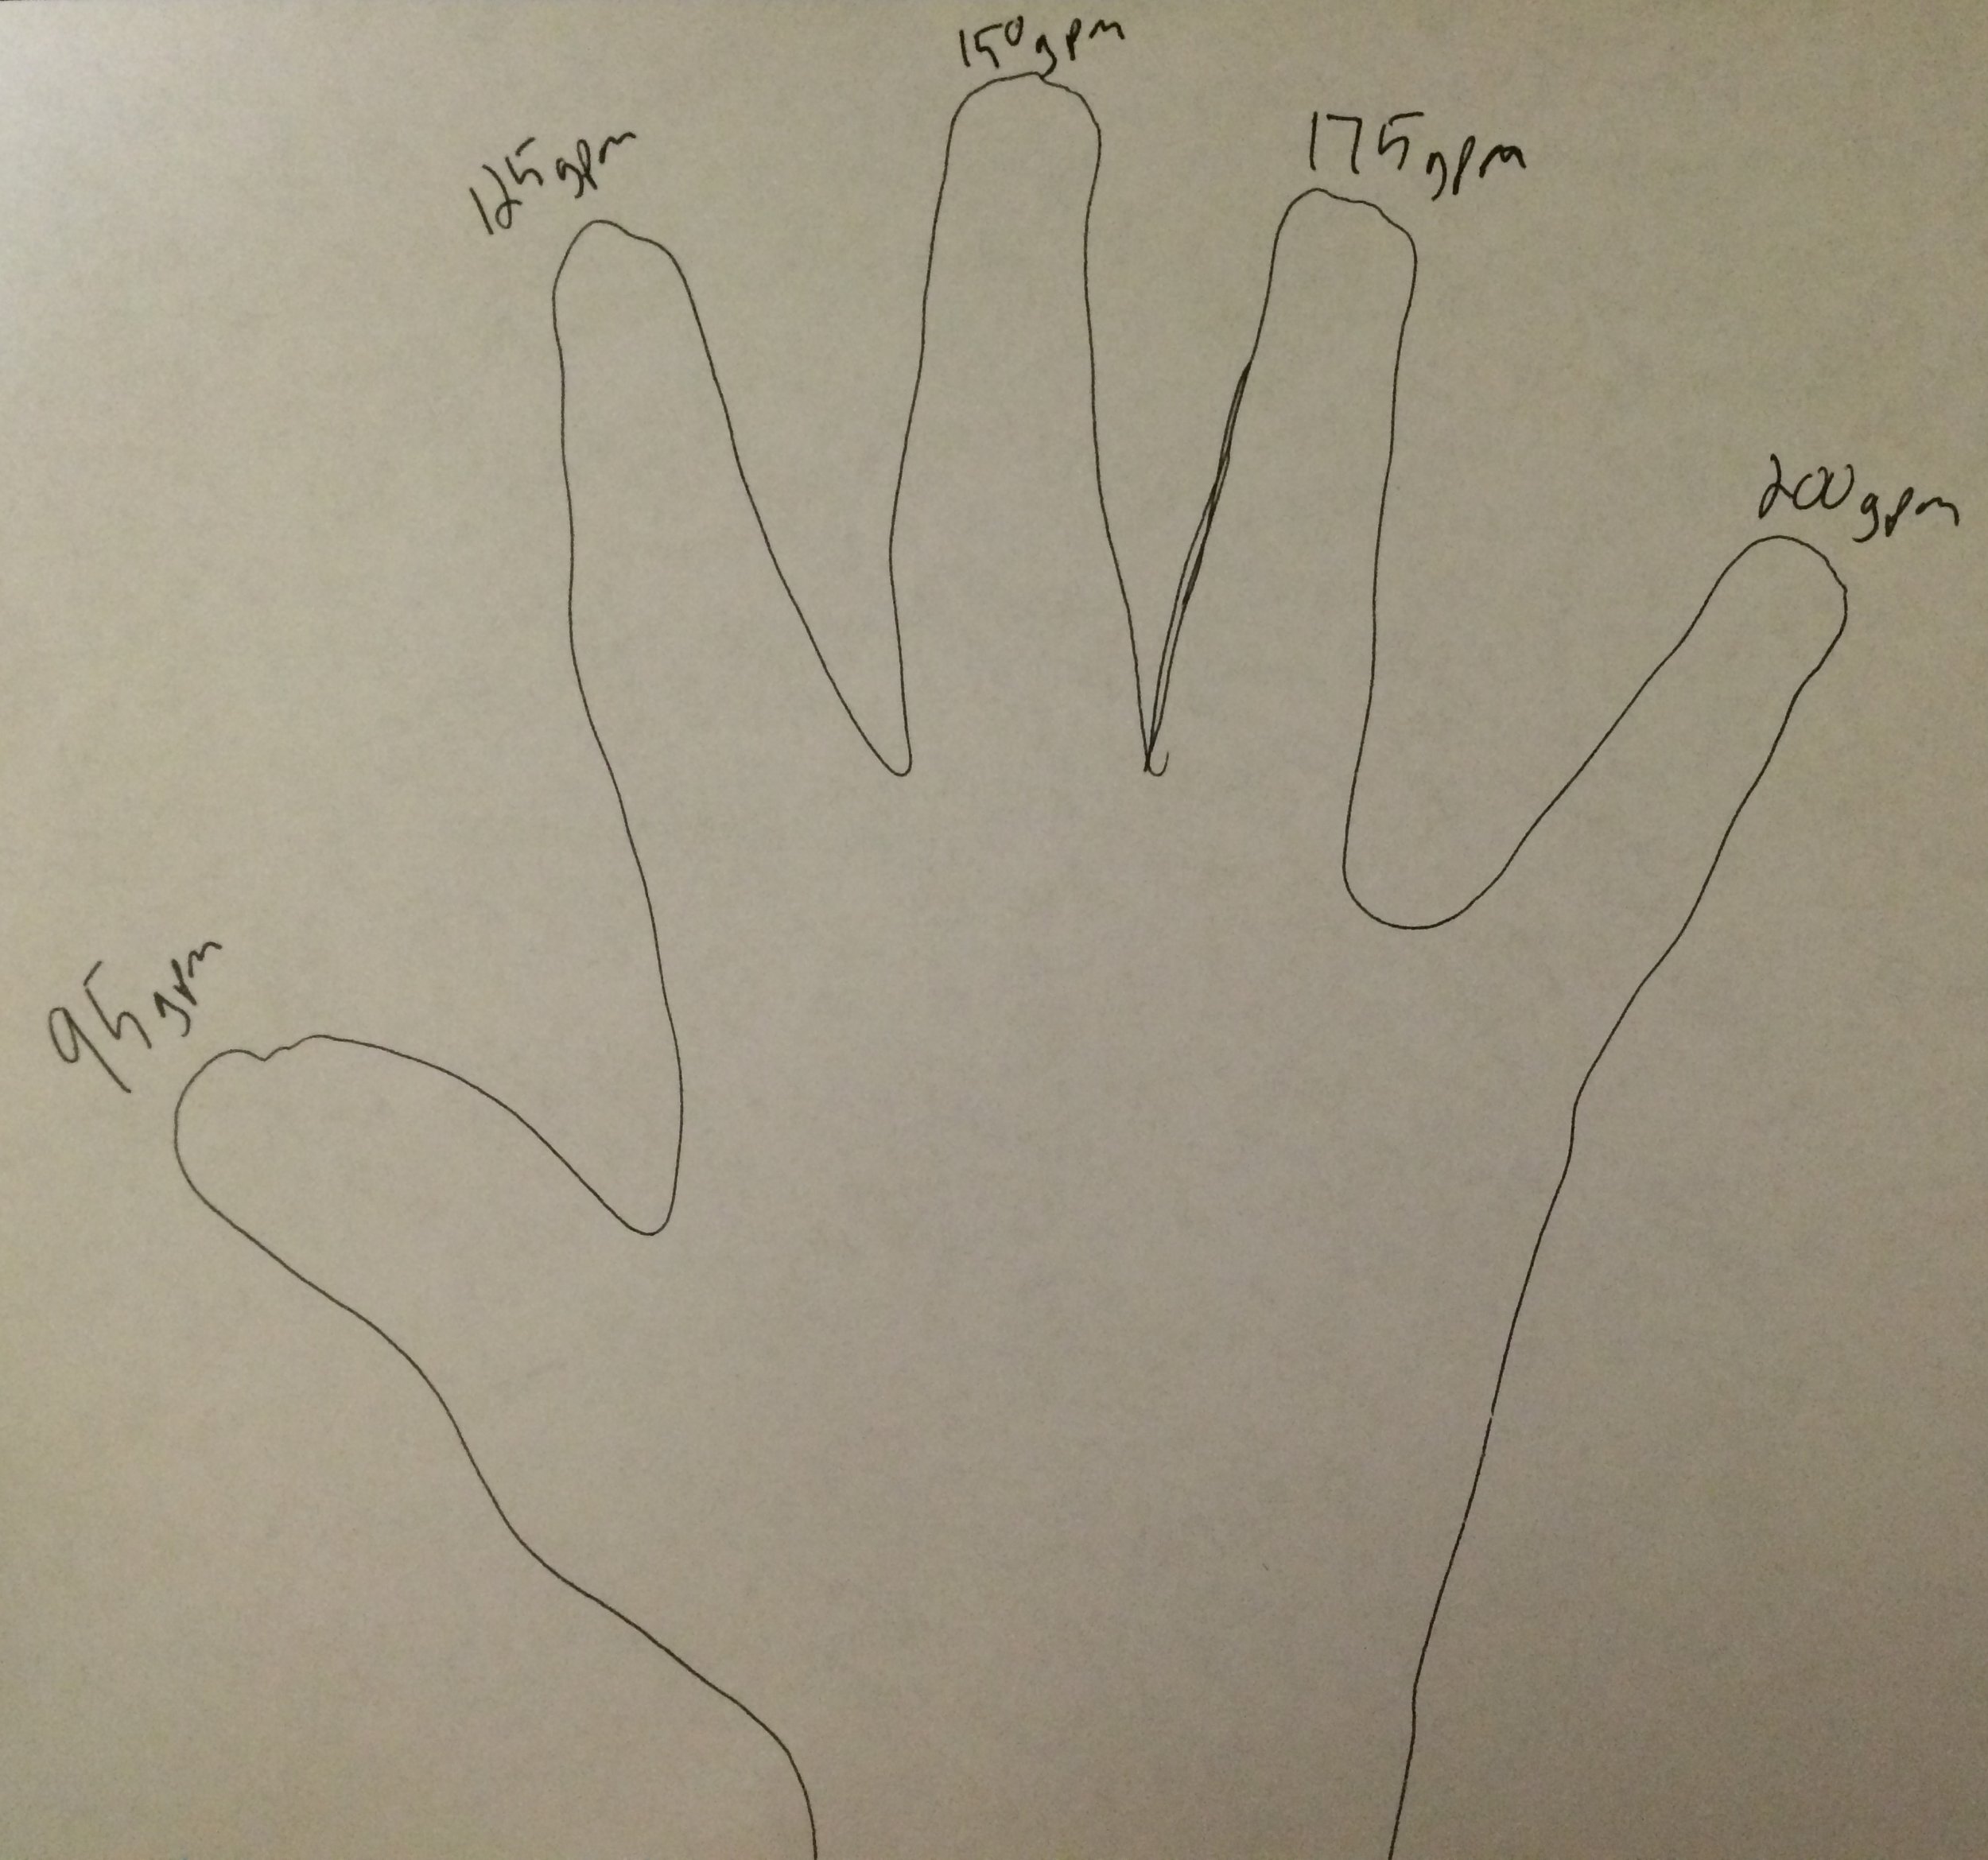
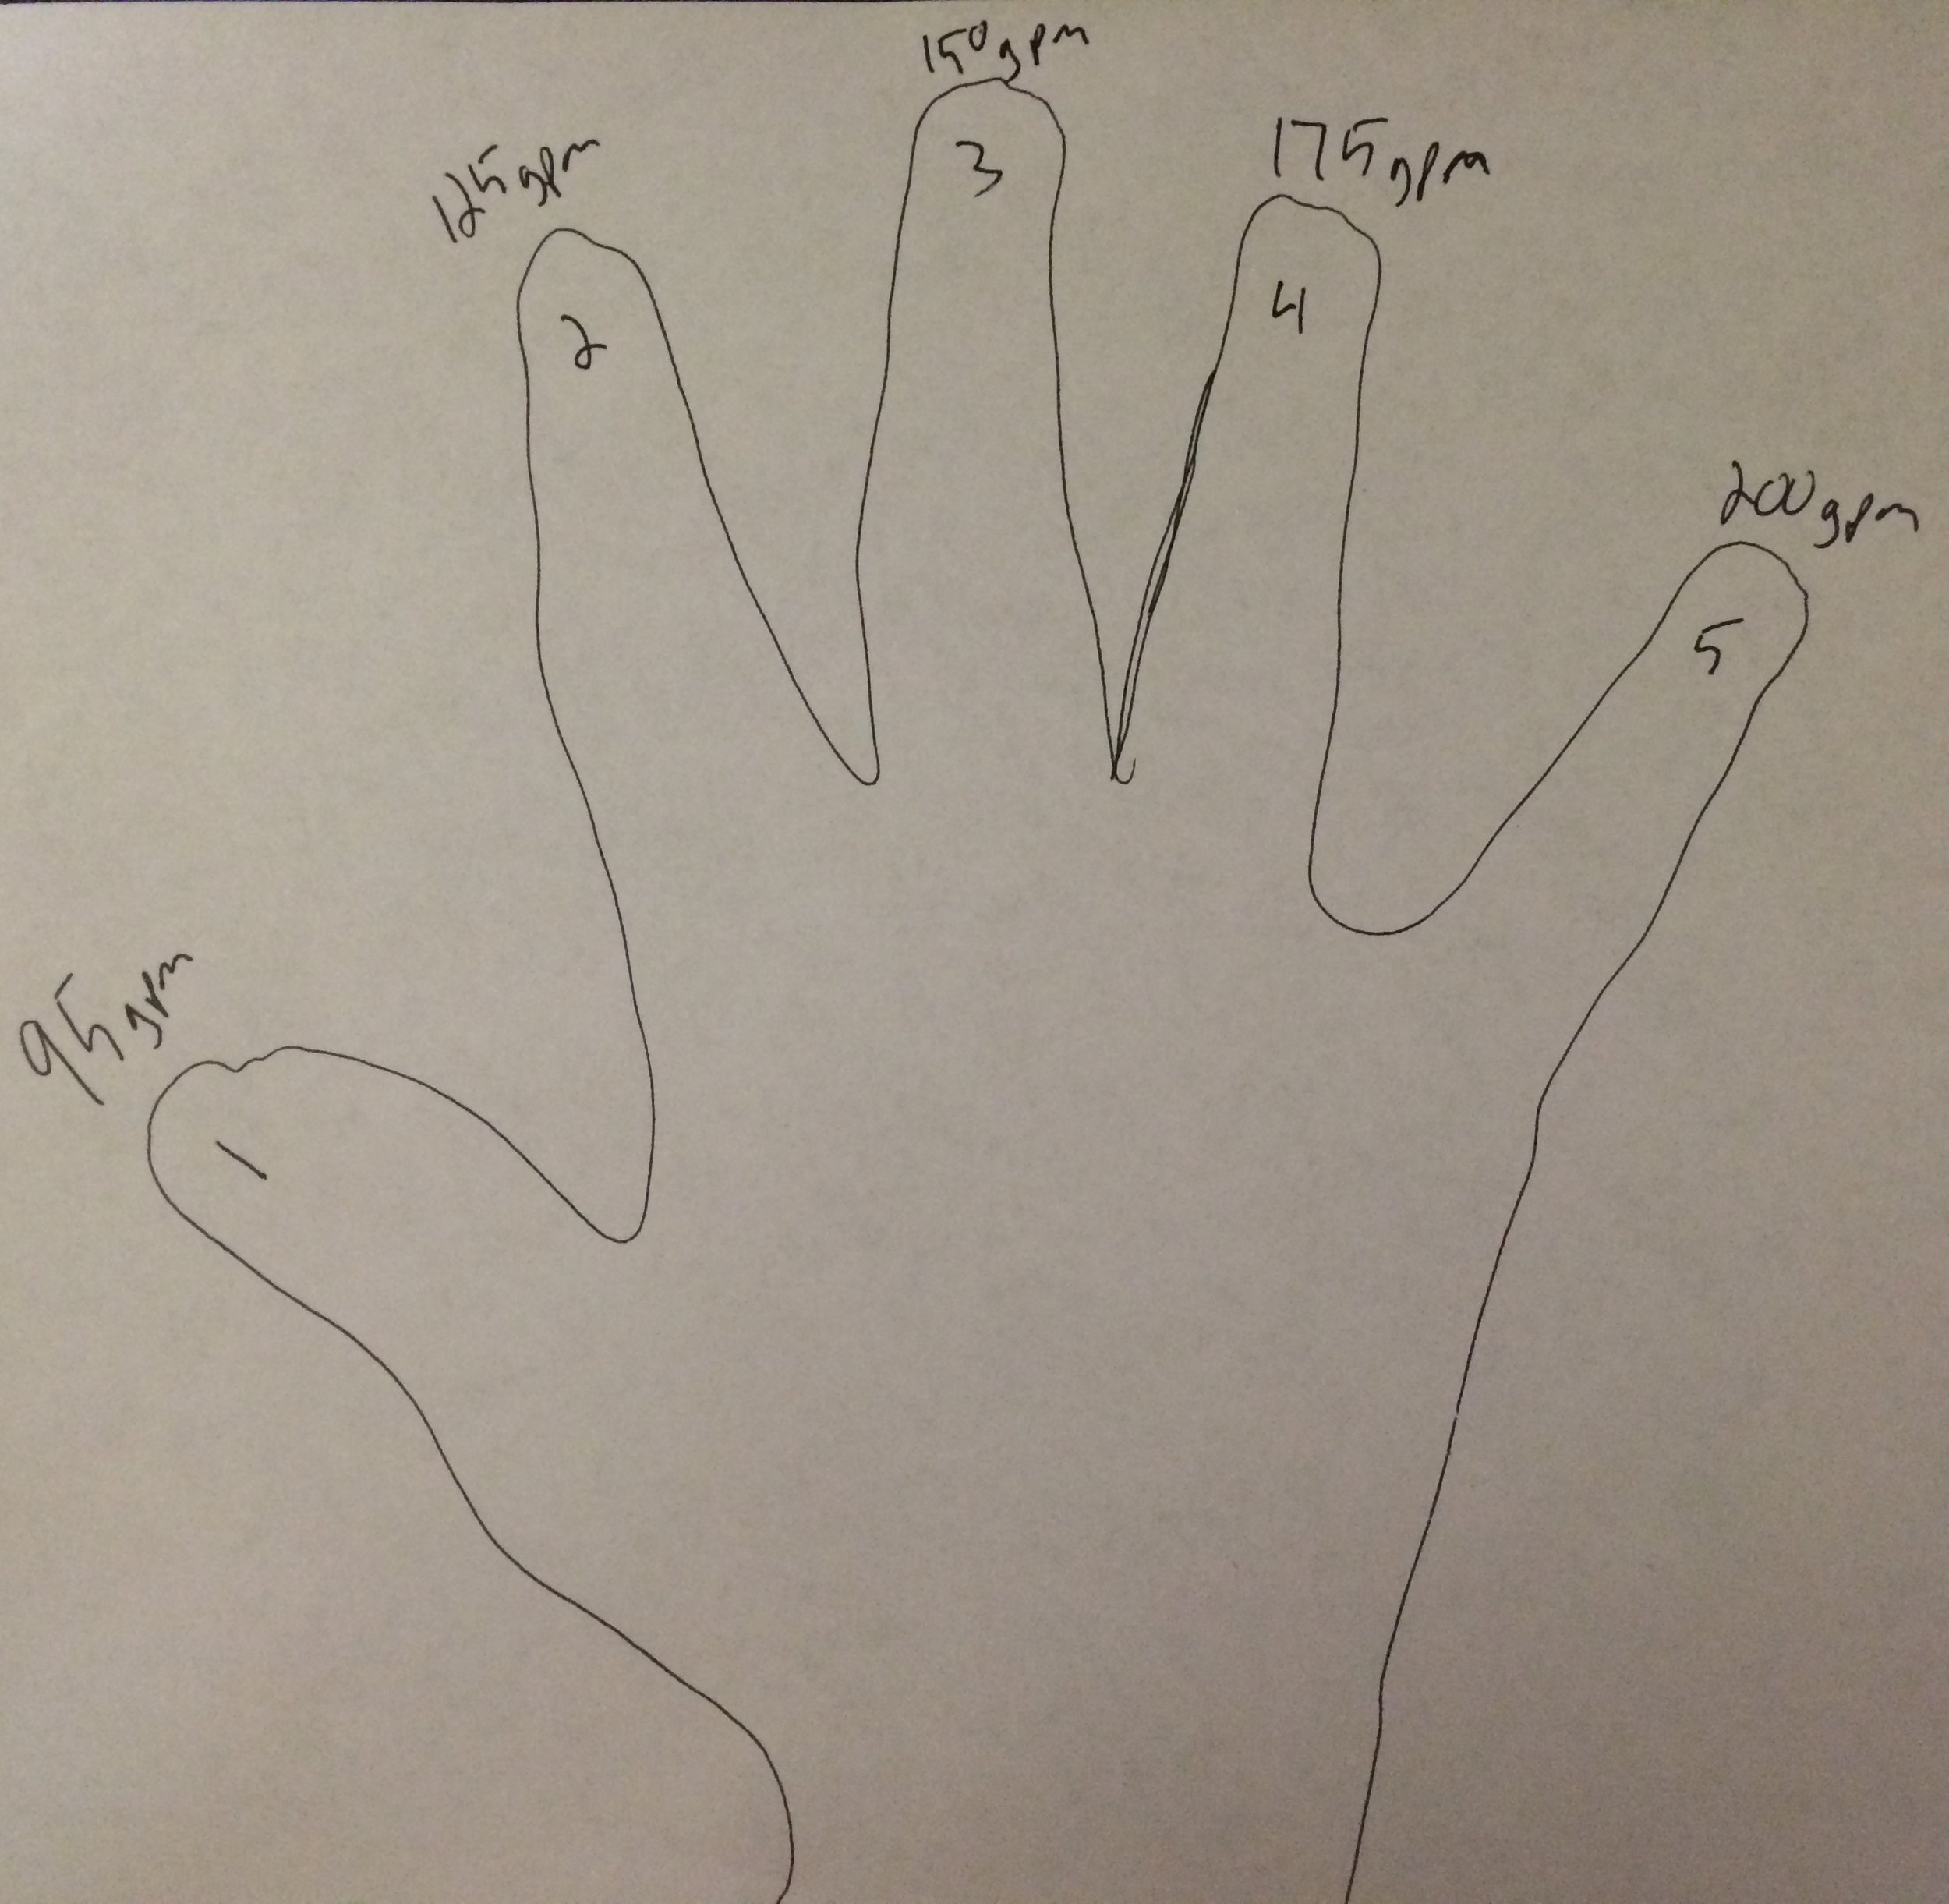
So, lets get started. Here again we will be talking about fog nozzles. Remember, most fog nozzles have four gallons per minute settings… 95gpm, 125gpm, 150gpm, and 200gpm. Now, hold up your left or right hand and spread your fingers. I’m right handed so I will be using my left hand for my descriptions. Imagine your fingers are the gallons per minute settings on the nozzle. Starting with your thumb. The thumb will be 95, index finger 125, middle finger 150, ring finger 175, and pinky finger 200. You can also use these GPM settings for rough estimates on smoothbore nozzle flows if you know them.

These are simple pictures, but they are the simplest way to explain this method.

STEP 1

The first step is to imagine your GPM settings across your fingertips. This would start with the thumb (95 or 100 GPM) then continue across the remaining fingers. (125, 150, 175, 200 GPM).


IMG_0234STEP 2

The next step is to number your fingers 1-5. You start by placing the #1 on your thumb followed by 2, 3, 4, and 5 on the remaining fingers.


IMG_0235STEP 3

To finish setting up your hand method you will imagine the number 12 in the palm of your hand.

In order to figure the friction loss, all you have to do is multiply 12 by whatever number or finger you need to use. We will use the same scenarios as we did in the last article.


Lets say you are driving one day and you pull up to a car fire. Your officer and firefighter pull the 100ft jump line and you know you need to be flowing 95 GPM. So, you look at your hand and you notice 95 GPM is at the number 1 position. Multiply 1 x 12.

1 x12 = 12psi

 That equals 12. Twelve is your friction loss. If you have a 100psi nozzle just add 100psi. 12psi friction loss plus 100psi nozzle pressure equals 112 pump discharge pressure.

12psi + 100psi = 112psi

You are probably thinking that this isn’t right because it doesn’t equal exactly 114 like the other method. And you are right, it doesn’t. However, I do not know a firefighter in America that can feel a 2psi difference on the end of the nozzle. Its not exact but it will work efficiently.

Next scenario, you are at a structure fire that requires a 200ft line flowing 200gpm.   The 200gpm setting is at the number 5 position on your hand, just multiply 5 x 12. It equals 60.

5 x 12 = 60psi

That is 60psi friction loss per 100ft. We have a 200ft line so 60 plus 60 is 120psi total friction loss. Then add your nozzle pressure, 120 plus 100 equals 220psi.

60psi + 60psi + 100psi = 220psi

That is your pump discharge pressure. The exact pump discharge pressure for this scenario would be 224. Here again, I do not know any firefighter that can tell a 4psi difference on the nozzle. If you are using 75psi low-pressure nozzles, it works the same way; just add 75 instead of 100. In terms of friction loss and pump discharge pressure, there are several ways to figure it. On the scene, there are multiple ways to determine friction loss and only one wrong way; that is not getting a proper amount of water to your firefighters. Without it, they can’t put the fire out and could be put in some serious situations because of it. You, as a pump operator, have to figure out how you want to do it. It may be the hand method, memorization, or something else. It doesn’t matter as long as you get the right amount of water to the guys on the nozzle.   I hope one of these methods will work for you and next time we will be discussing the Subtract 10 method for calculating friction loss in a 2.5" hose.

FOR A DOWNLOADABLE PDF OF THIS ARTICLE CLICK HERE.

Denver Fire Department: Leadership So Everyone Goes Home

Screen-Shot-2014-06-12-at-7.56.37-PM.png

The National Fallen Firefighter's Foundation has just released it's newest Everyone Goes Home video with the Denver Fire Department. Take the time to watch this and share it with your crews. The National Fallen Firefighter's Foundation has produced some great content to help other departments learn from one another.

Everyone Goes Home LogoI am currently the Lead State Advocate for Everyone Goes Home in the State of Mississippi. If you are unfamiliar with Everyone Goes Home check out the links I have provided that will send you to your own Advocates. They can help you get training material and resources to use at your own fire department. You will find a tremendous amount of resources on the website www.EveryoneGoesHome.com

Here is the link to the Learning Media Center

Here is the link to the Firefighter Life Safety Toolbox Resources

Here is the link to the Video Resources

Here is the link to find your Local State Advocates

Here is a final video message from Chief Billy Goldfeder:

LP Live Fire - Helmet Cam Footage

Screen-Shot-2014-05-21-at-6.21.29-PM.png

Check out this helmet cam footage from the Mississippi State Fire Academy during a recruit class Night Burn. This is filmed from a helmet cam attached to an instructor during the LP live fire training for the NFPA 1001-I-II basic recruit course. During the evolutions students learn to control and isolate valves for LP fire events and also fight a simulated vehicle fire. You will see a highlight reel from three different burn props; the Vehicle Fire, "Christmas Tree", and the Pump Flange.

Video was shot with a Fire Cam Mini HD helmet cam.

The footage you saw was filmed at the Mississippi State Fire Academy's LP Live Fire area which consists of five large concrete pads designed specifically to prevent environmental contamination.  These training areas include: a fifty foot flowing fuel fire (LP gas Christmas Tree fire); LP gas tank fire; LP gas tank fire; pump seal fire; twenty foot vertical tank fire with exposures; horizontal tank fire with an exposed small tank truck; and a three story evolution simulating a chemical processing plant fire.

The Mississippi State Fire Academy is located just outside the capitol City of Jackson in Rankin County, Mississippi, on eighty five acres. The Academy features a Fire Research Building which simulates a three-story residential structure with an attic, and a commercial structure with a basement.  The building contains over 4,000 square feet of training space and is equipped with five computer controlled fire/smoke rooms and a Class A burn room with a liquid propane gas fueled fire simulator.  A four (4) story drill tower is also attached to the burn area.  

The campus also features a five-story Drill Tower which provides opportunities for high-rise ladder, rope and firefighting operations.  In addition to this tower, there is a communications tower erected for training purposes. There is also a Hazardous Materials training site consisting of a large train derailment simulation with eleven cars.  Railcars are movable and the training site is piped with liquid/vapor propane for simulated fires and leak simulators.


BullEx Live Fire Demonstrations at FDIC 2014

IMG_1725.jpg

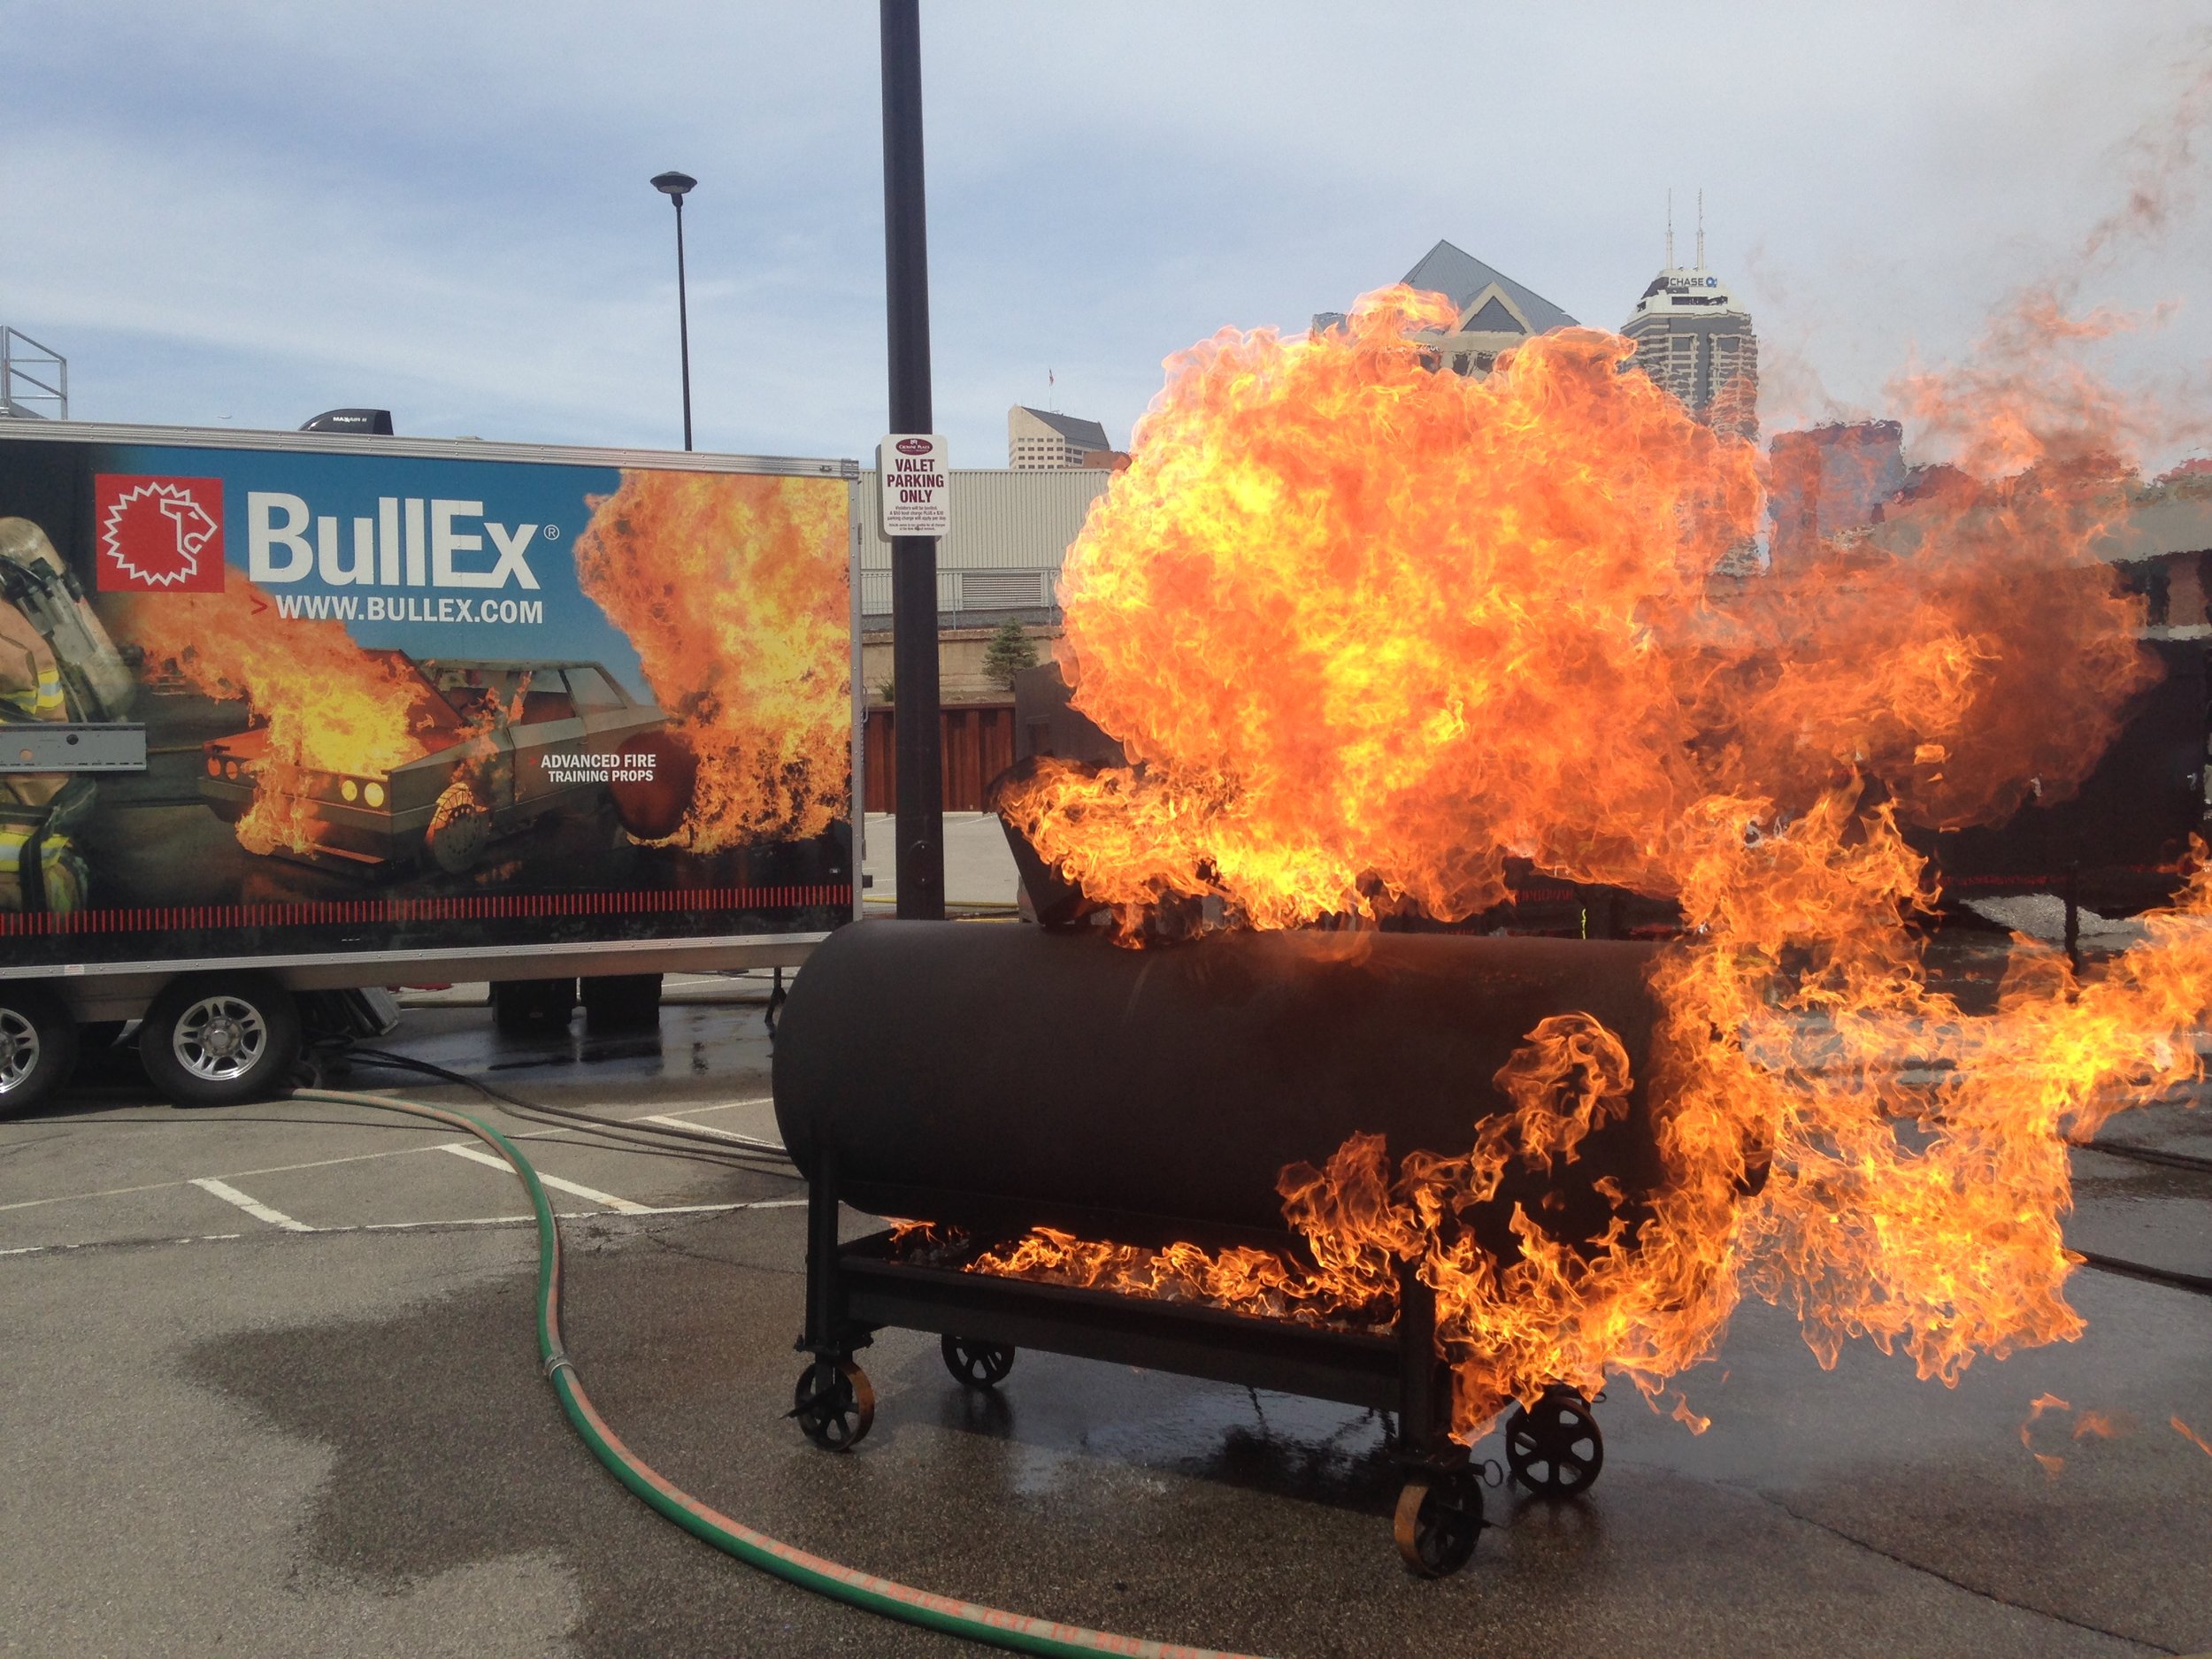
Pressure Vessel Prop I put together a few quick clips from the FDIC 2014 BullEx live fire demonstrations for you to see. They showed off their Gas-Fired training props and their Digital Fire training props. During the live fire demonstration you can see them attacking a pressurized vessel fire simulating something like a propane tank with a pop-off valve. You will also see them entering a structural fire prop with a Gas-Fired prop on the first floor and a Digital Fire prop on the second floor. The BullEx Digital Fire training system uses a screen to produce the "fire" image and a smoke machine to generate the smoke inside the structure. You can use a nozzle to attack the fire and the screen senses the flow and will dim as you extinguish it. It produces a very realistic look inside when combined with the smoke generator.

Dumpster Prop

Gas Grill Prop


BullEx also had their dumpster and grill live fire props for you to view. These are propane fired props controlled remotely. Lastly, take a look at the inside view of the new digital fire training system.

Are you USAR Ready?

IMG_1912.jpg

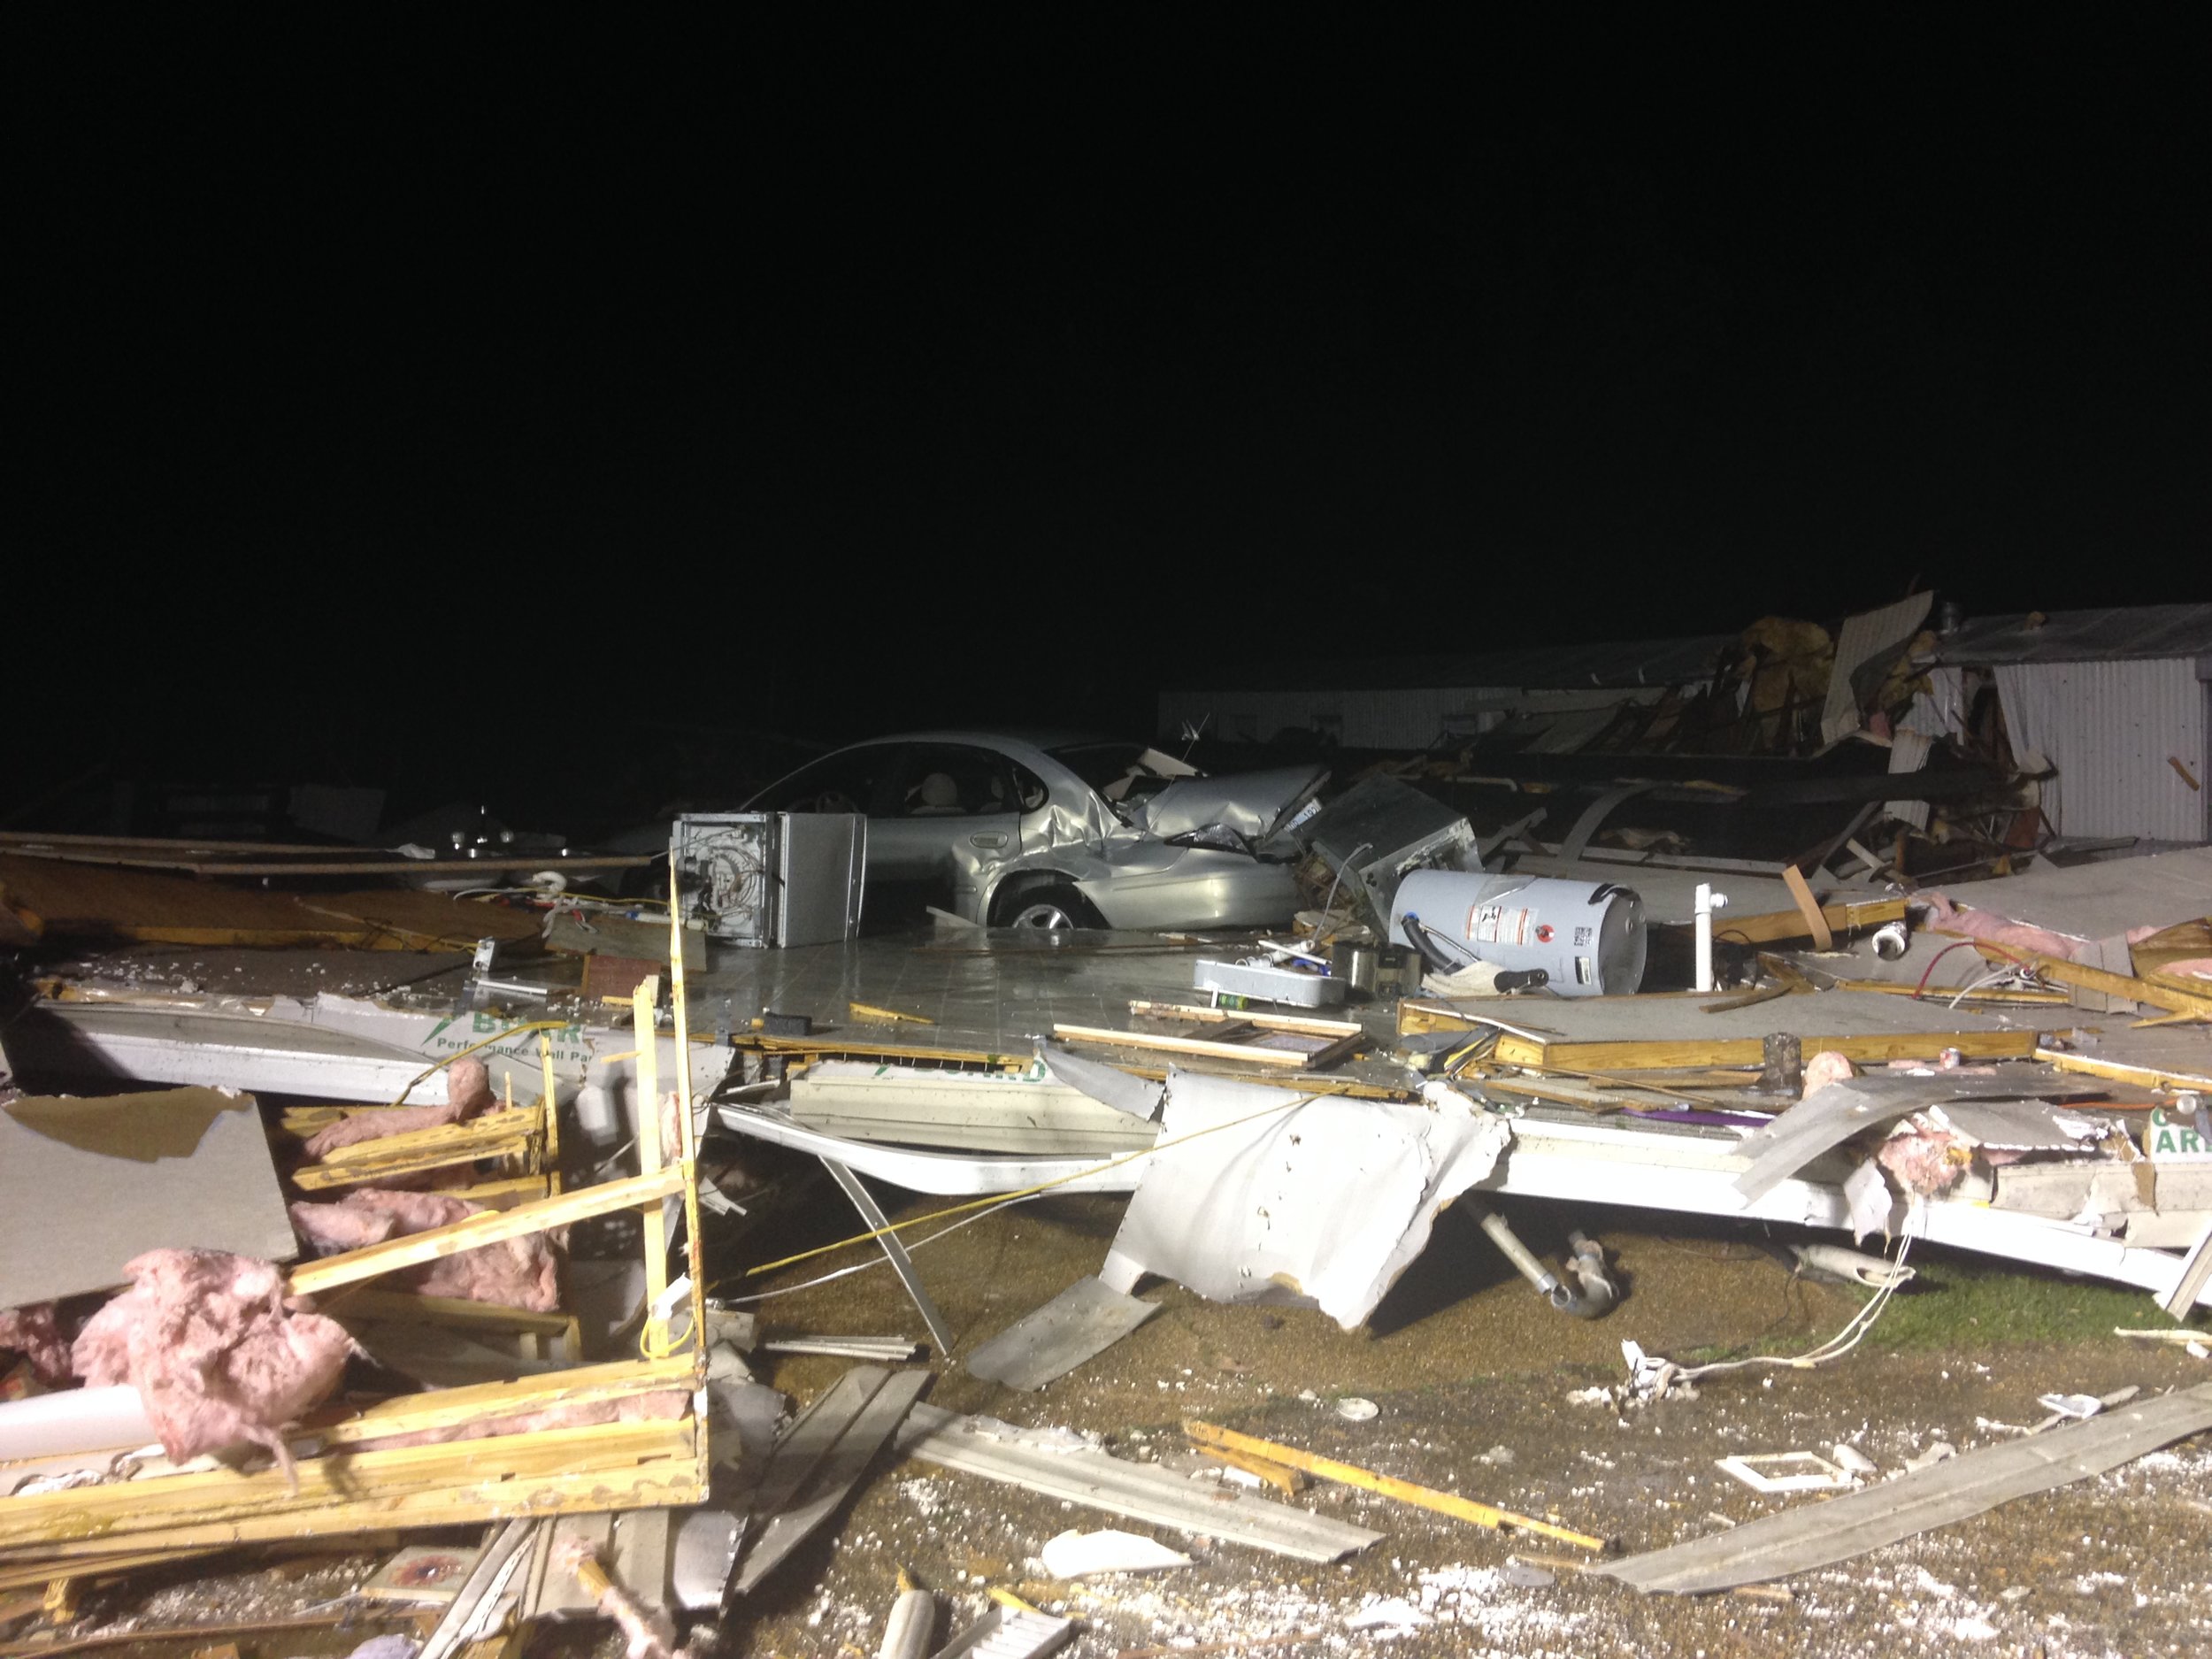
Tornado DamageI have had the unfortunate opportunity to work several tornado incidents each with it's own set of obstacles to overcome. I have seen the overwhelming need to be personally prepared for these incidents and for you to not rely on anyone or any agency for assistance.  Whether you respond locally or are deployed on a multi-day mission, you need to be prepared. There are many must have items when you are tasked with search and rescue operations during these disasters. Many of which you can prepare ahead of time or when imminent severe weather is approaching. I put together this video awhile back and thought it might need to be re-posted due to the recent events. Share this information with your fellow rescuers, you can never be to prepared when something like this happens.

If you need help building your own response kit, check out the National Association for Search and Rescue's Pack List.  You can click here to view and print this document.  You can use this list to decide what you believe is relevant to your needs.  I can assure you that you will nearly always need: Batteries, Navigation Equipment (GPS, Lensatic Compass), Flashlights, Boots, Gloves, Helmet, Food to snack on and plenty of WATER!

Even if you believe you are going on a USAR mission, one that will have an urban landscape, it will not be easy to navigate. Urban landscapes turn into wilderness landscapes very quickly after a tornado or hurricane. You will loose road signs, landmarks, electricity and even natural features will become hard to identify in the carnage.

Friction Loss for Beginners

IMG_1840.jpg

Jackson, MS Engine 6Friction loss is something that is stressed about and is made out to be very difficult for new pump operators.  In reality it isn’t.  This is how the definition is read: Friction is the force resisting the relative motion of solid surfaces, fluid layers, and material elements sliding against each other (Friction, 2013).  Friction Loss is the pressure loss due to the friction.   In this case, the friction is water sliding against the interior of the fire hose. To overcome this, the pump operator must throttle up to ensure that the firefighter, on the nozzle, will have the appropriate amount of water to suppress the fire.   Friction loss can be calculated using mathematical equations which is the Theoretical Method.  You can also calculate friction loss using a series of easy to use methods that do not require a lot of math, these are called Fire-Ground Methods.  For the purpose of this article we will focus on the fire-ground methods.  I feel there is not enough emphasis put on fire-ground methods.  All too often when a new pump operator is being taught friction loss the instructors jump straight to the equations because they are the hardest to grasp.  No offense to the great pump operations instructors out there, but I haven’t seen too many calculators on the fire scene lately.  How can a firefighter figure this stuff out on the scene?  Theoretical calculations are generally used for pre-planning, spec'ing apparatus and calculating problems ahead of time; for instance making pump charts. You do not use theoretical calculations on fire scenes. There are multiple fire-ground methods for 1-¾ line, but I will talk about the one that works best for me… memorization.  Yes, it sounds hard but its not.   Its simple… just memorize the friction loss for the gallonage setting(s) on the nozzle.  Most 100psi adjustable fog nozzles have four settings 95gpm, 125gpm, 150gpm, and 200gpm.  So, all you have to remember is 14, 24, 35, and 62.  These are the exact amounts of friction loss per 100 feet based on the gallonage above.  There is 14psi friction loss per 100 feet when you are flowing 95 gallons per minute.  If you have a 100-foot line your friction loss is 14, if you have a 200-foot line your friction loss is 28.  It works the same way for the other gallonage settings.  For example, if you are flowing 150gpm on a 100-foot line your friction loss is 35, if you are using a 200-foot line you friction loss is 70.  Keep in mind this is just the friction loss; it is not the pressure you pump at the engine.  In order to figure this, you have to take into account nozzle pressure.

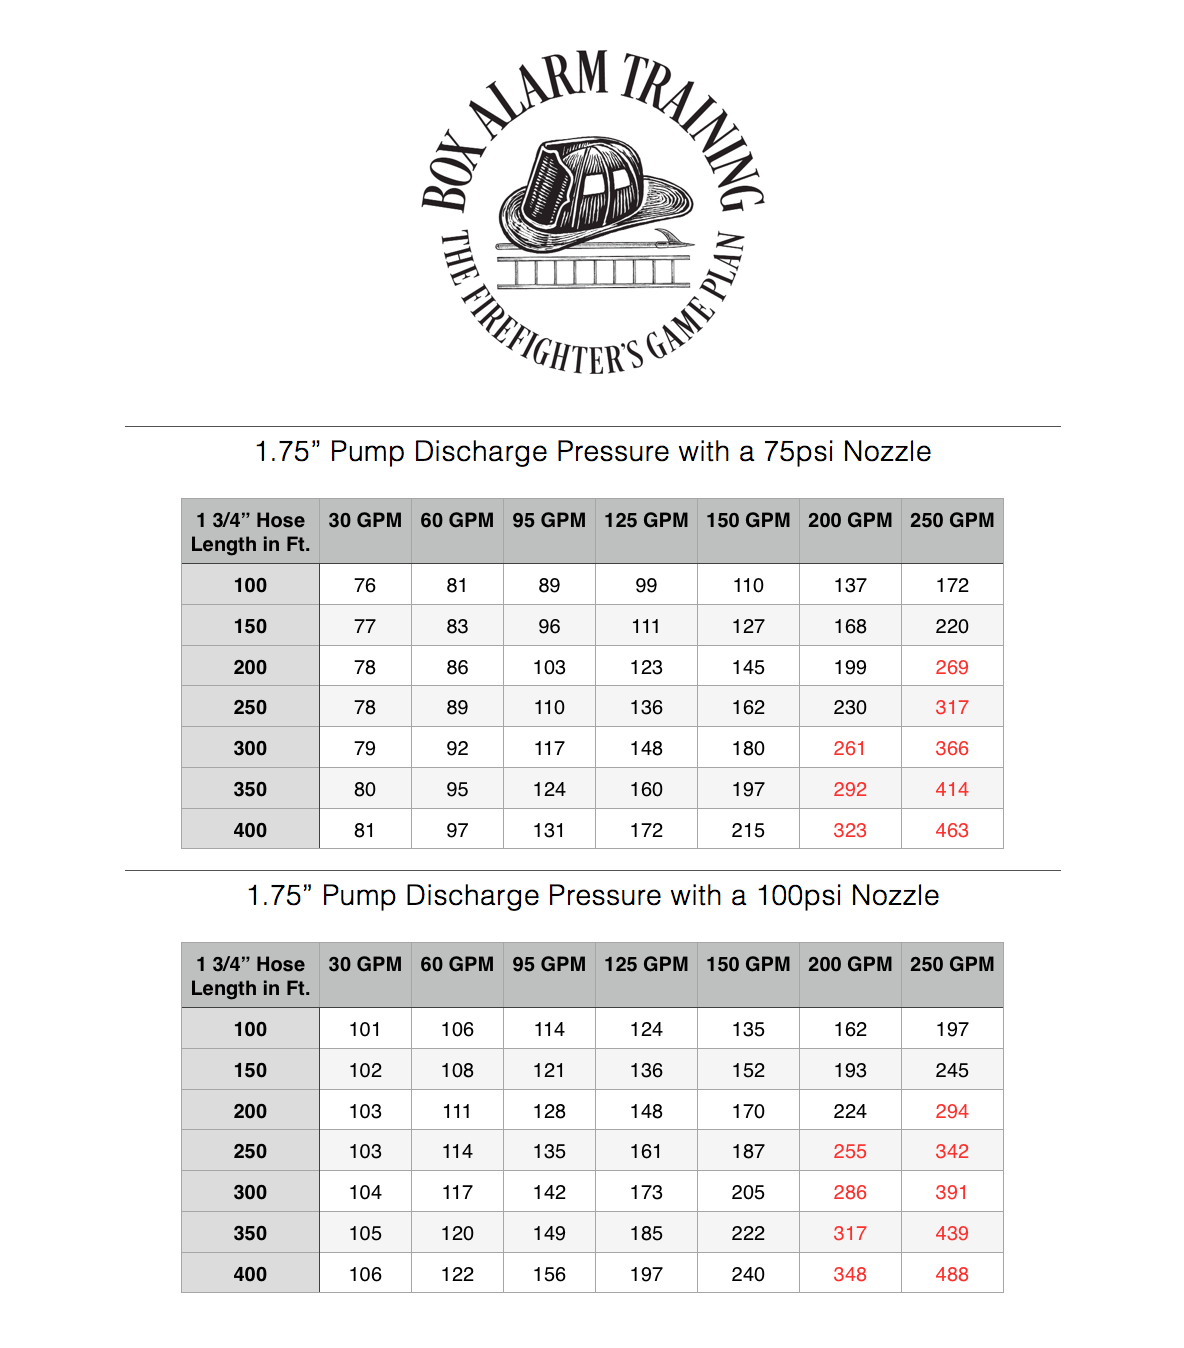
Box Alarm Training- Pump Discharge Pressure ChartMost fog nozzles require a pressure of 100psi or 75psi for it to function properly, this is called the Nozzle Pressure.  So, all you have to do is add 100psi or 75psi (Depending on your nozzle) to whatever your friction loss is and that will be your required Pump Discharge Pressure.  So, lets say you are driving one day and you pull up on a car fire that only requires a 100-foot line.  Your department’s SOPs require you to flow 95gpm while fighting this fire.  This means you have to figure the friction loss, which is 14, and then add it to the nozzle pressure, which is 100.

14 (Friction Loss)+ 100 (Nozzle Pressure) =114psi (Pump Discharge Pressure)

So, 114psi would be your pump discharge pressure.  It works the same way with the 200gpm setting.  If you are at a structure fire and you need to flow 200gpm out of a 200-foot line; first, figure the friction loss, which is 62 per 100.  62 for the first hundred plus 62 for the second hundred equals 124.  After this is figured all you need to do is add the nozzle pressure, in this case it is 100.

124 (Friction Loss) + 100 (Nozzle Pressure) = 224psi (Pump Discharge Pressure)

So, 224psi is your required pump discharge pressure.  This method works the same way on low-pressure fog nozzles.   They usually have a nozzle pressure of 75psi.  So, instead of adding 100psi just add 75psi.  In no way, shape, or form do I claim to be a great pump operator or even a good one for that matter.  I have just figured out what works for me and I can do it efficiently.  You may want to try the hand method… It requires too much on scene math for me.  However, in my next article I will explain it. Until then just click on this: The Pump Discharge Pressure Chart.  You can make your own pump charts for your engine which will tell the pump operator what to pump for each line on your engine.  You just find the gallonage and the length of hose you have, then the chart tells you what pressure to pump the truck.

You can also download a printable PDF version of this article by clicking here.

To read about our contributors including Wes Anderson click here.

Friction. In (2013). Wikipedia. Wikimedia. Retrieved from http://en.wikipedia.org/wiki/Friction

Fire Attack for the Modern Era

Screen-Shot-2014-04-07-at-8.27.02-PM.png

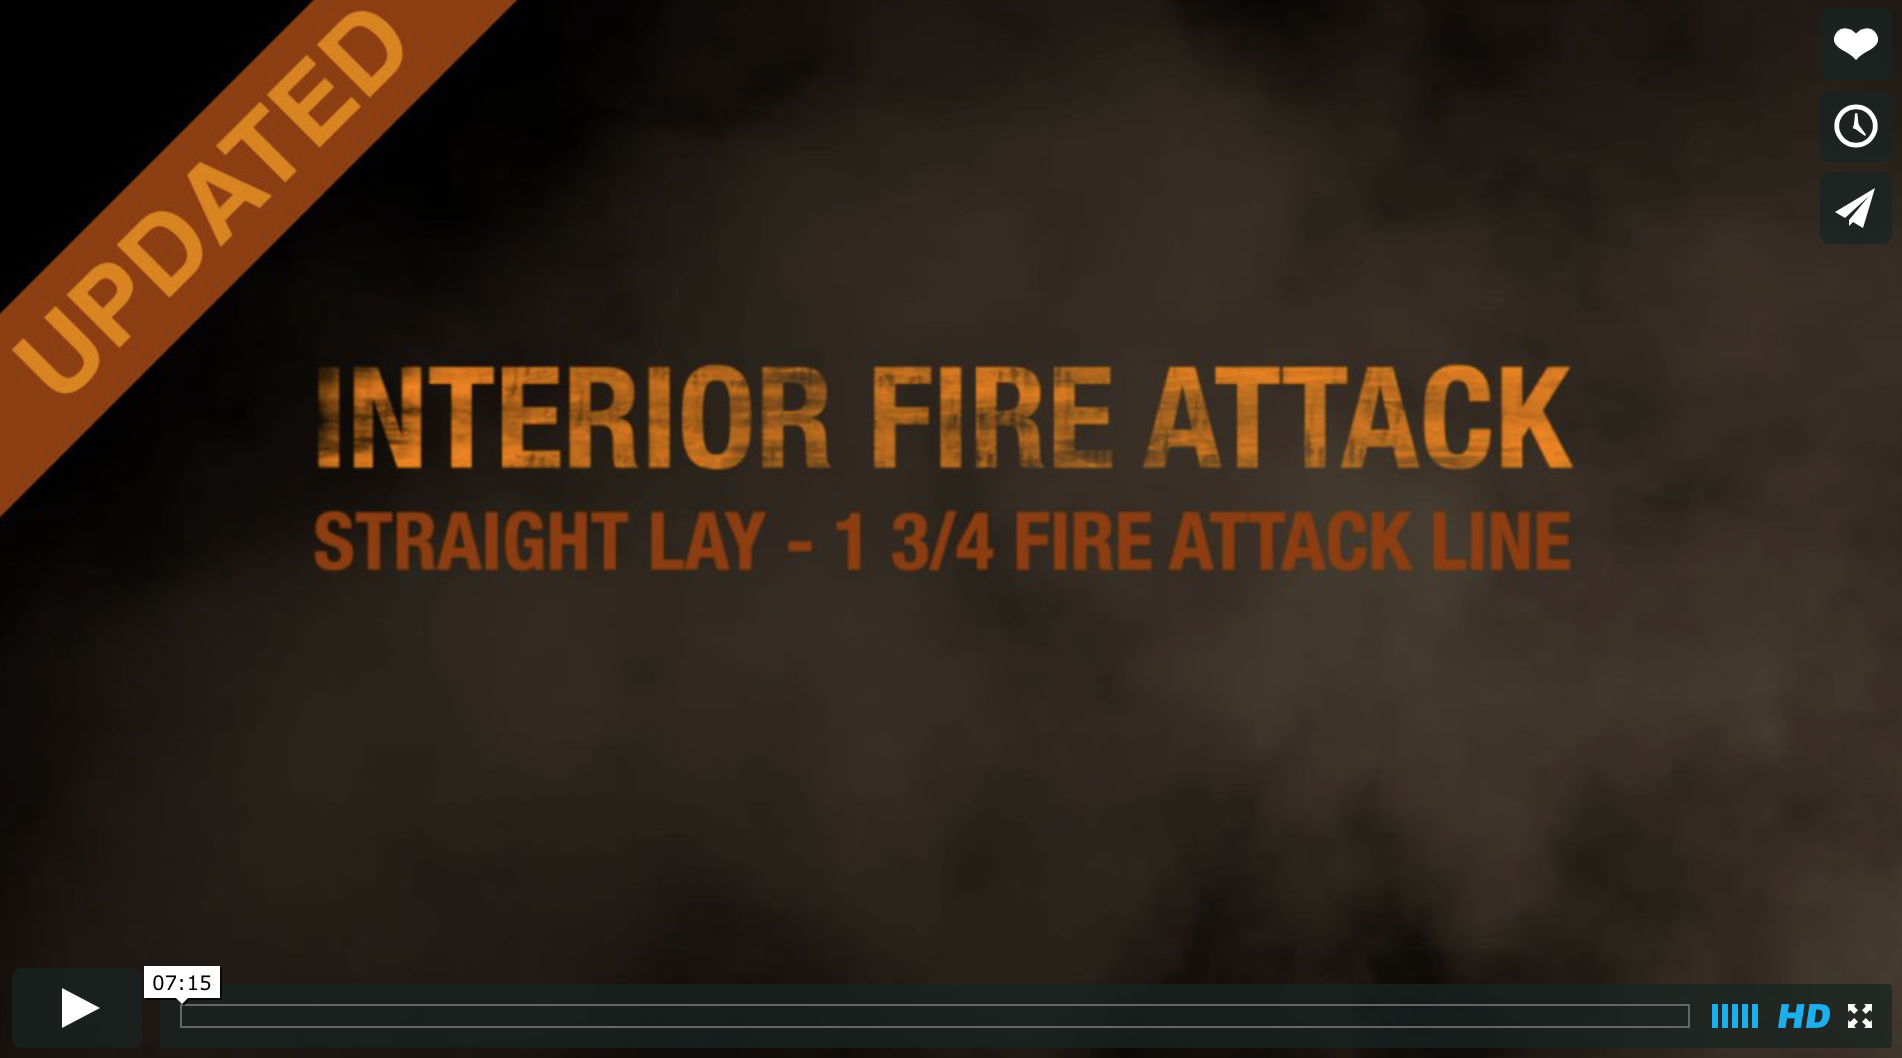
If you have your ear to the ground on the latest research in fire tactics then you should be familiar with some of the findings that have come to light.  The LA County Fire Department has put together a really good video on one of the most common bread and butter fire attack methods that nearly all of us have in our play books.  Take a look at the video below and if the tactical recommendations surprise you then read into this article a little deeper.  There are many things you should know about the modern fire behavior concerns we have. Interior Fire Attack

For more information on the latest fire research check out “Scientific Research for the Development of More Effective Tactics” – an online course that serves as a culmination of the full-scale field experiments performed on Governors Island by the Fire Department of New York, NIST and UL. UL FSRI Director Steve Kerber shared, “This training program presents the most up to date fire dynamics research in a way firefighters at all levels can comprehend.  It builds off of all of the UL and NIST firefighter research to date and provides students with the science they need to examine their tactical approaches.  Tactical considerations are presented with video and data in a way that is easy to understand.  For the firefighters out there that want all the details, buttons allow access to all of the data graphs, experimental video and relevant FDNY procedures.”

CLICK ON THE PATCH BELOW TO GO TO THE NEW ONLINE COURSE!

UL FSRI Patch

Understanding the most up to date research and attack methods will help you make the right decisions on the fireground.  While no course can prepare you for the real world, this information will definitely fit in your toolbox.  This is a great course to share with your crews. Feel free to comment in the section below or if you have any questions feel free to contact us.


Firefighter Bailout! Are You Ready?

image_6.jpeg

As firefighters, we often feel invincible and believe that we will always be able to perform whatever duty we are called to perform without negative consequences.  At the same time, we are continually reminded every couple of days that we are not invincible with the announcement of another line of duty death.  Take a look at the video.  Would you be able to escape if ladders had not been in place?  How about on an upper floor out of reach of a portable or aerial ladder?

Many people discount the need to be ready to bale because a lack of hi-rise buildings in their district.  According to NFPA & OSHA statistics, 90% of all falls from a distance of over 10' are fatal when free falling a distance of 10' or greater.  If you operate in a two story or taller building, it would be smart to be prepared.

Although every major turnout manufacturer that I know of is offering a firefighter bailout kit or escape harness, many fire departments are not purchasing them due to the added cost and trying to operate on already thin budgets.  As firefighters, this leaves us on our own to do what is necessary to be prepared in terms of training and equipment should we have to make an emergency escape.  What follows is a ridiculously easy and relatively inexpensive option to be prepared.

Many turnout manufacturers are now offering turnouts with nylon belts and plastic quick connect buckles instead of suspenders.  These pants already have loops, Velcro tabs, or both to keep the belt attached to the pants.  If you are currently wearing this style pant, remove that belt.  All it is good for is holding your pants up.  Replace it with whatever truck style belt you already have or can afford.

Turnout Pants

Turnout Pants with Gut Belt


These are the same pants, but the supplied belt is removed and replaced with a “Gut Belt” that I had hanging in my locker.  In addition to holding my pants up, this belt:

  • Is manufactured to NFPA 1983 requirements for ladder/escape belts.
  • Rated at 8000 lbs.
  • Can increase visibility if equipped with reflective and/or fluorescent trim.
  • Has hardware that exceeds NFPA load specifications.
  • Has multiple points of attachment.
  • Can be utilized with existing factory loops and tabs.
  • In conjunction with other equipment for personal escape and firefighter rescue, would be far more effective than a nylon belt and plastic buckle.  Also useful with, ladder work, carrying other tools or accessories, tags lines, etc.

Xtreme RescueWhat if you’re using turnout pants equipped with suspender tabs and no loops or tabs to hold a belt?  No problem with these inexpensive velcro loops that hang on your suspender tabs.  These are not holding any weight. They just provide a means to keep an escape/ladder style belt on your pants so it can easily be utilized.  These are manufactured by Extreme Rescue.  I picked them up at FDIC.  You can visit their website at xtremerescue.com.


Xtreme Rescue Gut Belt

For me, this is a good option to provide a balance between purchasing and dealing with the bind of a complete escape or rappelling type system with leg loops and being completely unprepared.


Lastly, keep in mind this is part of a system.  A belt alone will not do you any good without at least a carabiner, a section of rope (how much is up to you), and practice, practice, practice.

If you have ideas, questions, concerns, or comments; please post them below or on our Facebook page.


*I am not associated with, nor profit from anything affiliated with Xtreme Rescue.

FDIC 2014 Recap

IMG_1567.jpg

For those of you unable to attend FDIC 2014 I have put together a summary of the events, innovations and must see apparatus that caught my eye. During FDIC it seems as though the entire city of Indianapolis is transformed into a place no cop should have to go... Let's start with a few of my favorite apparatus at this years conference.  Columbus, Ohio had a very functional pumper built by Sutphen and spec'd by some guys that really thought out their tactics.  Low hose beds are a favorite with me along with tool accessibility.  Charlotte, NC also brought unique design specs into the construction of their pumper built by Smeal.  You will notice it carries two ladder racks, double decker rear hose bed storage, and some very specific mounting options for tools and equipment.  Lastly, Dekalb County, GA put together a really well designed pumper built by Pierce Mfg.  It features a very low hose bed, front suction, side ladder storage with step-ups to access.  Take a look at the gallery and comment below to let us know what you think. [flagallery gid=3]


The next gallery features several innovations that we saw at the exhibit halls.  You will see an assortment of interesting products and design ideas.


[flagallery gid=4]


On Friday night we attended the Firefighter Turnout hosted by Paratech Fire & Rescue EquipmentAmkusTECGEN XTREMEBlack Diamond Fire and Fire Cam Police and Fire Cameras.  We had a blast and had the opportunity to meet several fire service social media giants and product designers like Rhett Fleitz (The Fire Critic), Willie Wines Jr. (Iron Fireman), Andrew Catron (Model City Firefighter), Isaac Frazier (Tactical Advantage Training), Paul Hasenmeier (First Due Tackle) and Rob Shield (Fire Cam).


[flagallery gid=5]


Thank you to all we met and we hope to meet you again soon.

Situational Awareness Video

Screen-Shot-2014-04-03-at-9.00.58-PM.png

This is a very good video put together by Peoria Fire Training.  The video details a strip mall fire on 99th Avenue just north of Peoria in Arizona.  Take a look at the video, share it with others, and take a look at some of the information below.

Situational Awareness and Decision Making

As firefighters we often face a multitude of decisions that need to be made at a moments notice.  This situations are very hard to prepare for on the spot, they must be churning in your mind before they happen.  Fundamentally what we do at a structure fire hardly ever changes.  However, the situation we are faced with is never the same.  We must rely on those fundamental play calls that every department should have down to a science.  Then when we encounter extraordinary situations we have the ability to audible to a solution.

So, if we have the plays mastered and we have rolled scenarios through our minds prior to the incident then our primary focus should be to recognize the blind side that can come at any moment.  All other functions on the fireground should be fluid and understood so that we remain open to audibles and call them when we need to.

Hats off to the Peoria Fire Department for sharing this information.  With training videos like these thousands of firefighters can learn from their experiences and recognize those red flags that are present on many of our day to day incidents.

Ladders for Life!

Screen-Shot-2014-03-28-at-5.47.52-PM.png

E-One 100' PlatformAfter the recent incredible ladder rescue in Houston, TX we decided to bring back a ladder training video we made last summer.  Whether you use aerial ladders, aerial platforms or ground ladders; raising ladders is a fundamental skill that all firefighters need to practice.  Just because you trained on how to properly raise a ladder during your basic training does not mean you are good at raising ladders.  This is a skill that needs to be practiced and rehearsed with your company.    


"You can stretch hose but you can't stretch ladders!"

During the rescue in Houston, TX many of you saw just how important ladder training can be.  The firefighters made it to the victim with no time to spare.  If the aerial had been positioned in a different location that rescue might have never happened.  The same is for ground ladders, if you do not get ground ladders off of the rig and in position they will not work!

Take a look at the video below and get with your crew to practice raising your ladders.  Make sure you discuss positioning, carrying, raising, extending, and tool considerations.  Ladders are very important pieces of equipment that all to often are left on the truck until we need them.

Boise Fire Close Call and After Action Review

Screen-Shot-2014-03-06-at-9.42.07-PM.png

This is an outstanding After Action Review from Boise, ID.  They have put together the incident videos and what they have learned from this incident.  This is great information to share with your crews.  Take the time to read and watch what happened.  Hats off to the Boise Fire Department for sharing this for all of us to learn. You can also download and print the After Action Review by clicking here.

***Boise Fire Department Close Call August 1, 2013***

Area and Department Information Boise, Idaho is the capital city of Idaho and is located in the Pacific Northwest in an area known as the “Treasure Valley”. Boise is bordered to the north by foothills at the base of the Rocky Mountains and, to the south, Boise extends into the Owyhee high region of the Great Basin desert. Population in the City is 212,303, with 606,376 in the metro area. The Boise Fire Department provides all hazard emergency service to Boise City and the Whitney and North Ada County Fire Protection districts. The department is divided into three battalions and operates 16 engine and three truck companies from 18 fire stations. On August 1st, Boise firefighters battled a 3-alarm 3-story residential structure fire and came within inches of suffering a tragic loss. Five members narrowly avoided being buried when a structural collapse occurred. The 6,200 square foot (Sq. Ft.), wood frame, 3-story home sat back on a corner lot. The residence was built in the late 1950’s and received approximately 4000 Sq. Ft. in additions throughout the years. The home was currently undergoing finish work and was not being lived in at the time of the fire. One of the captains assigned to the first alarm had seen photos of the interior on a real estate website two weeks prior to the fire.

The structure presented firefighters with a number of unique challenges. Generally, a residential structure of 6,200 sq. ft. would fall more in line with a 4 to 6 unit apartment or condominium building. However, when dealing with apartment occupancies, we find fire rated doors, walls, and compartmentalized interiors; all of which assist us in slowing fire spread. The Hill Rd. structure had an open floor plan that provided large common areas for fire to travel, unimpeded, throughout the structure. This is especially concerning when the fire is a wind aided event as experienced with this incident.

First alarm companies assigned to the incident were E9, E16, E2, T5 and BC2. For BFD, each additional alarm mirrors the first with the addition of a medical supervisor and ambulance on the 2nd alarm. Apparatus staffing for the Boise Fire Department is a minimum of three personnel on engine companies and a minimum of four personnel on a truck companies.

The Hill Rd. fire was dispatched at 2127 HRS. The evening weather was stormy, with high winds, relative humidity in the teens, and a temperature of 88 F. E16 and BC2 were just clearing a power line down call and were responding from the E. 48th St area. E9 was the first to arrive on scene and encountered wind from the northeast blowing smoke towards the street and obscuring the E9‘s captain’s view of the situation. The captain was able to see the reflection of fire off of a white vinyl fence that ran the length of the Delta side property line, which he believed indicated a fire on the Charlie/Delta corner of the home. During his walk around, the E9 captain noted that only the sunroom on the Charlie side was involved with fire. A full 360 degree size up was not performed, due to a locked gate along the Charlie side and reports from bystanders that the Delta exposure was catching on fire. The Charlie/Delta exposure, a neighboring house, was 20 feet away. The Bravo/Charlie exposure was within 15 feet (of?).

After providing a size up, the E9 captain ordered a direct attack on the Charlie side and communicated that they would be in a defensive mode, initially, with a mindset that they might be able to knock it down from the exterior and then transition to an offensive interior attack. He indicated that he was concerned about protecting the Charlie/Delta exposure. The E9 captain ordered his firefighter to pull a 1 3⁄4” pre-connect (185 GPM) to the Delta side to begin fire attack. He stated that, in hindsight, he wished he had initially ordered a 2 1⁄2” line.

E16 was the second engine to arrive on scene. The E16 captain stated that he was familiar with this house from pre-planning. He was aware that it was vacant and for sale and had been remodeled multiple times through the years, adding large un-compartmentalized spaces. He also noted the possibility of this being a wind driven event.

The E9 and E16 captains met face to face where E9 stated that he wanted E16 to get the garage door on the Delta side opened up in hopes that they could stop the fire at that location. The E16 captain initially ordered a second 1 3⁄4” pre-connect as a backup line (per E9 Captain) but then changed the order to a 2 1⁄2” line for greater knock down power with the rapidly spreading fire. From that point, the E-16 captain and driver became “task driven” in gaining access through the garage door. The E16 firefighter worked a 2 1⁄2 line that was flowing 250 GPM with a fog nozzle by himself. Ten minutes after the first fire unit arrived on location, the E9 captain radioed the IC an urgent message to tell him he saw evidence of an imminent collapse on the Charlie side. The IC immediately announced for all personnel to clear out of the collapse zone. Nine seconds after this transmission, a global collapse of the 2nd and 3rd floor occurred.

The E-9 captain advised that he reported the imminent collapse when he witnessed bare studs on the Charlie side cracking. Furthermore, he stated that he had never seen a similar collapse in his 25 years on the job. He expected an eventual collapse, but thought it would occur locally, not globally. Fortunately, he was in a position to observe collapse indicators and report them prior to when it occurred.  The E16 captain’s recognition of the exposed wall studs and second floor TGI trusses once the garage was opened up was noteworthy, but did not seem like a critical issue. Two weeks earlier, this house was for sale online with numerous photos of the interior, including the garage area. Once he noticed the exposed studs in the garage during the incident, he believed this was just a small area still yet to be sheet rocked from the recent renovation. Situational awareness is only as good as one’s perception accurately matching reality or, in this case, wishful thinking matching reality. What the E16 captain didn't know was that the structure had been vandalized two days prior. Someone had plugged drains, turned on the water, and flooded the home. A restoration company had just removed a lot of the sheetrock throughout the structure, to aid in the drying of the wood. This provided incredible flow paths for the wind driven event.

Working on the Delta side, the E16 captain said, “There were times when the wind appeared to stop.” In hindsight, he determined that it is likely the surrounding fences, trees, and houses blocked most of the eye level winds, giving him a false reading on how hard the wind was still blowing.

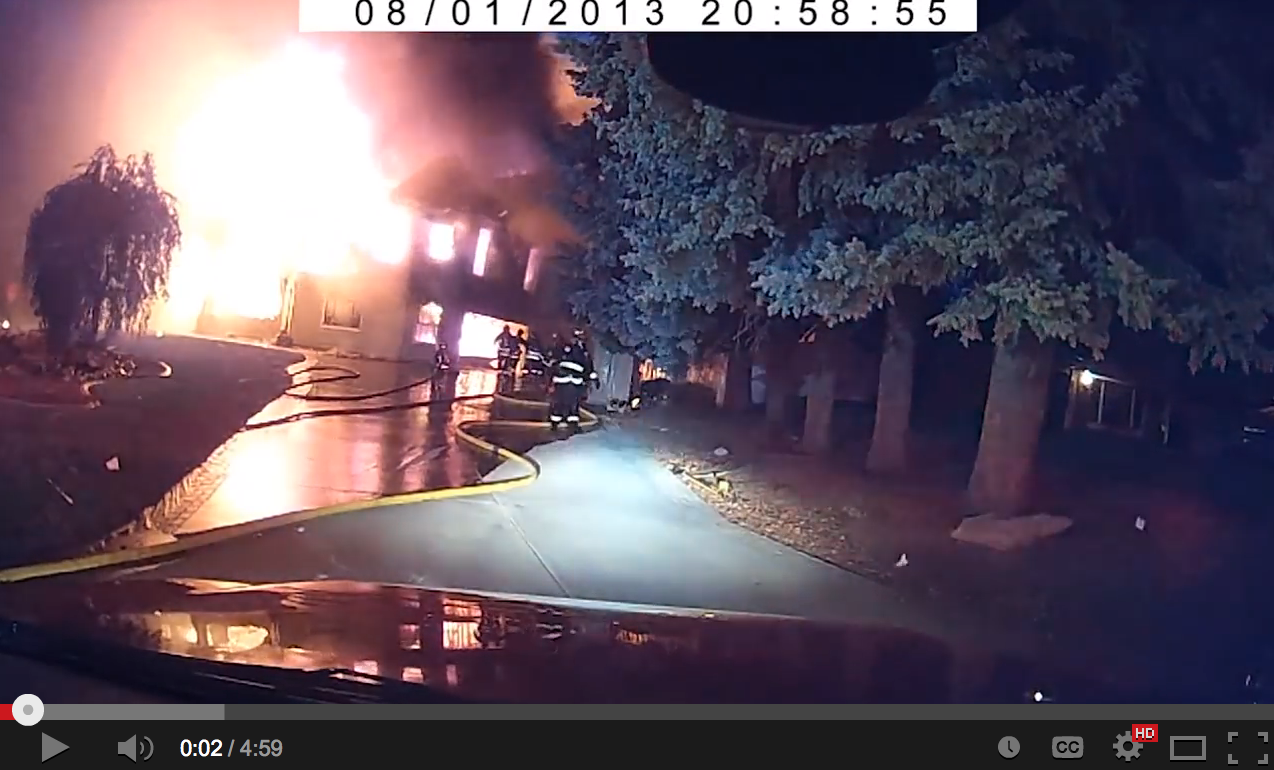
Below is the Dash Cam Footage from the Incident Commander:

BC2 and E16 arrived on location two minutes behind E9. BC2’s initial concern was in limiting the fire to just the structure involved due to the high winds estimated at 20-25 mph on his arrival. Winds along the base of the North Boise foothills extended several miles from NW to NE Boise. The thoroughfare is at the base of nearly continuous wildland urban interface development upslope to the north. Many of the homes in older developments still have wood shake roofs. The home involved was on the north side of Hill Rd. E9 transferred command to BC2, advising that they were “defensive for now". It was clear that this rapidly escalating incident would be a challenge, at best. In anticipation of additional units arriving to assist, the IC began assigning tactical level supervisors to assist with maintaining an appropriate span of control. When the second BC arrived (BC1), he was assigned as Fire Attack Group Supervisor and was given E9 andE16 to manage. A couple of minutes later, T5 and E42 were added to the Fire Attack Group. By this time, E9 had extinguished the Delta exposure and was attempting to make access to the Charlie side of the main fire building as fire had extended to the interior. E2 was sent around to the west side, where Hill Rd. turned to the north following the shape of the foothills. The E2 captain was assigned as Division Charlie Supervisor and was given E5 and T6. Division Charlie was assigned to protect the Charlie exposure and provide a size up of structural exposures, reporting any wildland issues to the IC.  The IC clearly noted when E9 made access to the interior from Charlie by the incredibly rapid fire spread from all three floors. The swirling downslope tailwind aided in this extreme fire behavior. This is clearly visible in the full dash cam video shot from the IC’s command vehicle on Alpha. E4, arriving on 2nd alarm, was directed to come to the incident command post (ICP) on the Alpha side. At the ICP, the IC told E4 he was going to make them RIT (Rapid Intervention Team), even though they were in defensive mode due to how fast things were escalating.

A little more than 15 minutes after the first call reporting the fire in the 911 center, E9 reported priority traffic and advised the IC of indications of an imminent collapse on the Charlie side. Seconds before this transmission, the IC is heard saying, “All units: we are defensive on the main fire.” The IC later advised that his reinforcement command of the defensive strategy was because of his discomfort in the structural stability. He could see that a firefighter operating a 2 1⁄2” line on the Alpha side was too close. Command’s view of crews operating on the Delta side was obscured by the row of large trees on the east side of the driveway. After receiving the imminent collapse traffic, the IC clearly announced for all units to back away from the structure and to back up out of the collapse zone. The collapse that followed was more extensive than anyone on scene had predicted. Judging from the reaction of firefighters in the Alpha/Delta area running towards the collapse, the IC feared that firefighters in the Fire Attack Group must have been caught in the collapse. The IC requested a second ambulance and tone alert for emergency traffic from the dispatch center. The IC began an emergency roll call, requested a 3rd alarm, and activated RIT (E4).

Third alarm companies, E6, E10, E1, T7, BC3, were directed to Cynthia Mann Elementary down the street for staging. While staging was being managed by E6, command was notified by dispatch that there was a roof on fire downwind to the south. With a complete roll call and just minor injuries at the Hill Rd. fire, 3rd alarm companies, led by BC3, were directed to the roof fire on a separate radio channel. After receiving a complete roll call, the second ambulance was cancelled and crews were positioned to operate 2 1⁄2” lines to keep the embers down. Eventually, the winds died down and companies were released. The IC scheduled a rotation to ensure at least one crew remain on scene throughout the night to put out hot spots. Brush 1 was staffed and assigned to patrol a several block perimeter for fire brands(?) and hot spots due to the intermittent gusting winds.  After Action Review One of the concerns facing firefighters was a situation experienced five years earlier on a significant incident. An incident, known as the “Oregon Trail Fire”, occurred in Boise on August 25, 2008 at 1900 hrs. This was a wildland urban interface fire that was fueled by high winds, low relative humidity and high temperatures. Sixteen homes were destroyed or significantly damaged and seven others received minor damage. Of the 23 total structures damaged, eight were a result of flying embers and not direct flame impingement. Aggressive defensive tactics on the Hill Rd. incident would prove important, as two other structures’ roofs caught fire during suppression efforts.

Close Call Both E9 and E16’s hoselines were found beneath the collapsed structure. BC2 stated that he expected collapse at some point, but did not expect it to occur so quickly or so globally. Crews operating on the Delta side were unaware of the advanced fire conditions in the rest of the structure, believing that the fire was isolated to where they were making their attack. Crews operating on the Delta side were also unaware of a master stream being placed into operation. From the IC’s location (dash cam), he did not realize crews on Delta were operating so near the structure when he gave the okay for the E9 driver to flow it. In hindsight, the IC indicated that he should have requested a tone alert and announced to all crews operating on the fireground that a master stream would be going into operation. Three firefighters were injured (back, head, ribs) during the collapse, but none were transported to the hospital.

Staffing Most captains operating on the Delta side indicated that they were too hands-on, which limited their ability to step back, view the big picture, and maintain accurate situational awareness. The ability to accomplish numerous tasks at any rapidly evolving incident is hampered with only 3-person engine staffing. Captains are not able to issue orders and observe visual and audio cues on the fireground when they are required to be so hands-on to accomplish an assignment.

Review of Emergency Traffic and Roll Call Shortly before the collapse, the E9 captain transmitted emergency traffic regarding collapse. This transmission did not go through, as he was walked on by another transmission. E9 Captain retransmitted his message a second time using the term “priority traffic”. The IC ordered crews out of the collapse zone just prior to collapse. Emergency Traffic would have been appropriate, according to BFD SOP.

The IC requested tone alert for Emergency Traffic from Dispatch. Only a single beep of the tone alert came across the radio, resulting in Division Charlie companies missing the announcement of an emergency roll call. This resulted in Division Charlie interrupting the roll call to report the collapse. The roll call was initiated and completed in two minutes and 40 seconds. At the time of collapse, the IC had not completed his tracking sheet and had to perform much of the roll call from memory.  Apparatus Placement The E9 captain indicated that he had considered pulling around to the Bravo side of the structure on E. Hill Rd., but opted to spot the apparatus on the Alpha side in order to position at a hydrant located in the front yard of the residence. E9 intended to have the second in engine (E16) spot on the Bravo side in order to stretch lines to the Charlie side. The E9 Captain didn’t realize that, due to the powerline down call, E16 was responding in from the east rather than from their quarters to the west. E16 ended up parking on the E. Hill Rd. side (Alpha), behind E9.

E2 was then assigned to spot on the Bravo side. Upon arrival, T5 spotted on the Alpha/Delta corner of the property. The T5 captain indicated that his apparatus placement was a deliberate decision to have his apparatus in an optimal position for aerial operations, if needed.

As units from the second alarm arrived, E. Hill Rd. became congested as apparatus were not placed to allow access for additional vehicles. East of the property on Hill Rd. was completely blocked. This could have been disastrous, had firefighters been critically injured with ambulances needing access for transport to the trauma center. This also made response to the exposure fire at 5195 Holly Hill Drive difficult, particularly for BC3.

Lessons Learned “Know what your fire is doing at all times.” This rule is adhered to on wildland fires to ensure that changing weather or fire conditions don’t catch firefighters by surprise. This is not always possible in the structural environment, particularly when we are making an interior attack and our senses are limited. However, on defensive or exterior operations, fire officers should slow down and assess conditions frequently. On smaller house fires, individual officers can scout and size up what they are dealing with. Larger structures, like the Hill Rd. home and many commercial buildings, make it difficult to scout and size up the fire behavior. In these instances, it might be necessary to have division officers, BCs or safety officers operating on specific sides of a structure to provide situational awareness for the IC and operating companies.

Items for Discussion Can you have an aggressive defensive position on a structure? Can you operate in the collapse zone on a defensive fire? If so, how can you help mitigate the risk?

Final Thoughts • A 360 degree size up is critical for situational awareness. • Defensive operations should be conducted with consideration to collapse zones, exposure protection, and firefighter safety. • Defensive operations require a different operational tempo than that of an offensive mode fire. We can still be aggressive but proceed with extra consideration being paid toward situational awareness. • Company officers must remain as hands-off as possible to maintain a view of the big picture on defensive operations. • Exposed structural members will lead to rapid fire growth and early building collapse. • Discipline and composure must be maintained at all times as demonstrated on the fireground around the time of the collapse. • Review performance measures with dispatch regarding tone alert, emergency traffic, and mayday protocols to ensure proper fireground communications. • Develop training focused on operational tempo, mindset, and situational awareness. • BC2 commented on the difficulty getting a grasp on the incident with excessive radio traffic of first alarm companies reporting on location, making assignments, waiting for responses, etc. BC2 suggested pre-assignments for typical residential structure fires may have been beneficial at this incident. • A Battalion Chief’s Aide would have been very helpful during this incident.

5120 Hill Rd. Incident Timeline /212751 Dispatch notified of fire at 5120 W Hill Rd. /213309 E9 arrives on scene, gives initial report, establishes Hill Command, and calls for a second alarm /213318 Second alarm dispatched E5 E42 E4 BC1 M26 EMS20 BGA /213514 BC2 on scene /213639 E9 reports a significant exposure on Charlie side and requests next in engine to respond in on Castle and position on north side of structure and protect Charlie exposure /213703 E16 on scene /213741 E5 on scene /213755 T5 on scene /213850 E2 assigned as Charlie DIV SUP /213856 E5 assigned to Charlie DIV /213933 T5 assigned to Fire Attack GRP /214040 E42 on scene /214058 T6 on scene /214131 E42 assigned to Fire Attack GRP /214204 T6 assigned to Division Charlie /214312 Command announces over radio that we are in defensive mode on the main fire /214315 E9 reports imminent collapse /214326 Command announces imminent collapse and orders all crews to back out of collapse zone /214340 Delta side of structure collapses /214401 Command requests tone alert from Dispatch, requests a 3rd alarm, and orders a role /214421 Third alarm dispatched (E6 E10 E1 T7 BC3 M23) /214452 Fire Attack Group Supervisor reports that T6, T5, E16, and E9 are all accounted for /214506 Command requests roll call from Charlie Division /214555 Division Charlie Supervisor reports that E2 & E5 are accounted for /214605 E9 driver accounted for /214616 E42 accounted for /214624 E42 accounted for /215119 E6 on scene /220009 Dispatch reports that residence at 5195 Holly Hill Drive is on fire /220046 3rd alarm units assigned to fire on Holly Hill Drive /002623 E4 on scene /004426 Command transferred from BC2 to E9 /004431 BC2 in service /004511 BC1 in service /004628 E16 in service /004904 142 in service /020728 E2 in service /064021 BR1 in service /095714 E3 in service /131030 E9 in service /131030 CLOSE

Helmet Cam Highlight Reel from Box Alarm Training

IMG_0578.jpg

We have compiled some Helmet Cam footage and made a highlight reel for you to check out.  Don't forget to look at our other videos and feel free to share them. Helmet Camera Footage from Matt Hinkle and Taylor Marks. Music by: Fallout Boy, "Light em up"

Camera used is the Fire Cam Mini HD. You can purchase one of these cameras at: www.firevideo.net

Calling the MAYDAY! Are we doing it correctly?

IMG_1312.jpg

Are we calling the MAYDAY correctly?

Most firefighters have been trained to use a MAYDAY procedure of some type.  Most of these procedures involve knowing the steps necessary to transmit a message via radio.  Calling the MAYDAY has been related to a fighter pilot’s parameters for ejecting from his aircraft.  Firefighters are put into positions that are inherently dangerous.  We train to perform under these conditions and we must also train for when things go wrong.  We have seen many different acronyms and MAYDAY procedures throughout the years but most still rely on a set list of information you are supposed to report when you need help. In general we rely on the firefighter with the emergency to report this message and to give us the information we need.  The question is should we put the responsibility of providing all of the information on the firefighter with the emergency?  Let’s evaluate our process first and then address the question.

When do we call a MAYDAY?

Firefighters must know when to call a MAYDAY before they can learn the procedures that follow.  Most of our training focuses on how to call the MAYDAY rather than when to call the MAYDAY.  It has been proven time and time again that firefighters are not calling MAYDAYs early enough.  We must engrain into firefighters when it is absolutely essential to make the call.  Certain parameters have been noted such as:

FALLS

Anytime you experience a fall you should initiate a MAYDAY.

COLLAPSE

Anytime you experience a collapse you should initiate a MAYDAY.

ALARM

Any situation which leads to you activating your PASS, whether it is distress or low air, you should initiate a MAYDAY. (Call via radio prior to activating PASS)

CAUGHT

Anytime you are entangled you should initiate a MAYDAY.

LOST

Anytime you are disoriented, separated or lost you should initiate a MAYDAY.

TRAPPED

Anytime you become trapped you should initiate a MAYDAY.

The common discussion that arises from the above is that we often experience very minor falls, collapses (sheet rock), etc.  Should we initiate a MAYDAY every time that happens?  This is why many departments have implemented a 30 second rule.  If you can correct your problem within 30 seconds then you do not have to call the MAYDAY.  This is a legitimate guideline for most departments.

How the traditional MAYDAY procedure is performed.

One of the most common methods of calling for a MAYDAY is the acronym L.U.N.A.R.  This acronym follows the format below:

L - Location

The firefighter needs to give his or her location.

U - Unit Number

The firefighter should identify him or herself by their radio designation or company.

N - Name

The firefighter should include his or her name in their radio transmission.

A - Assignment / Air

Depending on the department you will see the “A” listed as your assignment, your remaining air or both.

R - Resources Needed.

The firefighter will request what he or she needs.

What is an alternative method?

The most important thing a firefighter can do when faced with this situation is to call for help.  If a firefighter does not initiate a MAYDAY he or she will not receive any help.  I first heard an alternative method from Chief John Salka.  His theory is fairly accurate.  Shouldn’t the firefighter just tell us Who, What and Where?  If the firefighter gives us that information then the officer outside the structure, who is in a much less stressful position, can ask the appropriate questions to get more information.

Conclusion

We need to ensure that we not only train firefighters on MAYDAY parameters and procedures but that we also have a plan put in place to help a firefighter should this situation arise.  It really doesn’t matter how good you are at calling MAYDAYs if your department doesn’t have a plan in place to help you.  This requires you to train, discuss, communicate and address the issues you might have with calling the MAYDAY.

CLICK HERE TO PRINT THE PDF ARTICLE FOR TRAINING ON MAYDAYS

Electrical Hazards

Screen-Shot-2014-02-11-at-8.27.28-AM.png

As firefighters we respond to many incidents where down power lines become an issue.  This video is a reminder that power lines can energize fences, structural components, water, etc.  Always use caution around these lines and evaluate your incidents constantly.  At this recent mobile home fire; firefighters were performing an attack when the service line at the rear of the structure fell and began arcing against the mobile home.  This could have caused the entire metal framed mobile home to become energized.  All firefighters were notified on radio and face to face to ensure they were aware of the hazard.  This was already a defensive fire so it was decided to back away from the structure until the power company could safely disconnect the line.

Firefighter Positional Assignments

Screen-Shot-2014-02-05-at-4.51.08-PM.png

Many fire departments all over the country utilize riding assignments in order to pre-assign a firefighter’s roles and responsibilities.  I have heard of many arguments for and against riding assignments.  I encourage you to thoroughly research the different methods that are being used and find a method that works best for your department.  In this article we will break down assignments into three common types.  We will then review the advantages and disadvantages of these methods. Reservoir Fire Department

In order to grasp an understanding of why departments use assignments let’s use an analogy to get started.  Every time we respond to a working fire we are essentially running a play just like a football team.  We can compare running offense and defense to the roles of the engine and truck companies.  Even if you do not have an official “truck company” you still have to play defense or you will lose the game.  If you took the best football players in the country and assembled them on a team with no playbook they would not be very effective.  They may be a very talented group and make things work, but giving them specific roles and responsibilities will enable them to perform much more efficiently.

Sandlot Football

The first, and most inefficient method of making assignments would be to assign the roles and responsibilities when you arrive on scene.  Just like a quarterback would draw routes in the dirt before running a play in a sandlot football game.  This is without a doubt the most inefficient method of assigning tasks.  However, many departments are bound to a version of this method due to a lack of staffing or fluctuation in response.  This is typically where volunteer fire departments are at a major disadvantage.  Many volunteer departments never know how many firefighters will respond or what equipment will arrive at a given time.  To combat this problem volunteer firefighters can do a few things to ease the confusion.  If riding in an apparatus firefighters can predetermine roles and responsibilities based on riding position or can rapidly discuss the positions prior to arrival.  If you allow P.O.V. response to fire scenes, then assigning functions on the fire-ground instead of specific tasks will make the assignment process much more efficient.  For example: assign firefighters to perform horizontal ventilation instead of telling them to go grab specific tools and which window to break.

Offense and Defense

The second method of positional assignments would be to assign each arriving company a role and responsibility.  This is basically like understanding that you will be playing offense or defense but you still do not know exactly what position you are playing.  This is largely because you lack the staffing to fill every position on the team so you might have to play running back and wide receiver.  In this method departments typically make assignments based on the order you arrive on scene.  The first arriving engine is generally Fire Attack, the second engine is typically Water Supply and the third is a Support Role.  This is a great way to have the advantage of predetermined roles for departments that are small and lack the staffing to assign detailed tasks to each firefighter.  For instance, if the department does not operate an aerial or dedicated truck company you can still assign the truck company functions to the third or fourth due engine.

Teammate Positions

The last and most efficient method of creating positional assignments is by assigning riding positions.  Now you not only know if you are playing offense or defense, but you also know exactly what your position is and what your role will be when the center snaps the ball.  This is typically used in larger urban departments such as the FDNY.  The more firefighters you have the more detailed your assignments can be.  The FDNY will give you a role, responsibility and even a tool assignment for each riding position.  While this helps fulfill the essential fire-ground functions it is very difficult for most departments to take riding assignments to the level of the FDNY.  Most departments will have to meet somewhere in the middle.  This is just simple math, when an engine is staffed with five firefighters they are able to perform more efficiently because each firefighter has a more focused responsibility.  If you are a textbook junkie you might know this as the division of labor.  Using riding assignments will reduce the duplication of effort on scene and will offer an enormous advantage to departments capable of assigning riding positions.

E-One 100' Platform

One of the most direct counter arguments to making predetermined assignments is that every fire is different so if we make predetermined assignments it will limit the abilities of the firefighters to adjust and adapt.  If you are using this logic then essentially you are saying that a football team should go to a game without a playbook or without knowing who should play what position.  Football coaches do not throw out their game plan because the defense they face this week is different from what they are used to.  When football players know their responsibilities they are able to audible to another play when the need arises.  Firefighters should be capable of doing the exact same thing.  If you know your role is ventilation and the fire requires a vertical vent, you do it.  If the fire requires PPV, then you audible and perform PPV.  The worst case scenario is that the fire did need a vertical vent but no one was assigned the responsibility of performing ventilation.  It is also said that every fire we respond to is different.  While this is true; what we do at every fire is typically very similar.  You do not have to over complicate things.  It doesn’t matter if you are fighting a single story residential fire or a multi-story high-rise, you will have to perform the same functions.  The only difference is that it typically takes more personnel, equipment and resources to perform those functions.  Let’s take a look at the common essential functions.

Fire Attack

This is typically the assignment of the first arriving company.  The faster and more efficiently we put water on the fire the better it gets for everyone.

Water Supply

Water supply is typically assigned to the second due company.  This may require the company to perform a forward lay to supply an engine with water, connect to an FDC or standpipe system, or perform a relay operation.

Search and Rescue

This assignment is usually given to a truck company but can easily be assigned based on your arrival on scene.  Crews might perform forcible entry, throw ladders, or perform searches in order to rescue victims.

Ventilation

Ventilation is typically assigned to a truck company also but can be performed by any engine company with the necessary equipment.

We can elaborate tremendously on the above essential functions and can argue that many more essential functions could be added but with using the K.I.S.S. method those are the functions that need to be filled.  If we had one Incident Commander, one Driver/Operator and eight firefighters we should be able to fill each of those functions.  As the incident becomes larger and more in depth then it will require more resources to perform the same functions.  Take the time to evaluate your department’s game plan and discuss how your assignments could help you perform on the fire-ground.

We have also provided you with a short video on Positional Assignments.

What is your Game Plan?

Smoke-Showing.jpg

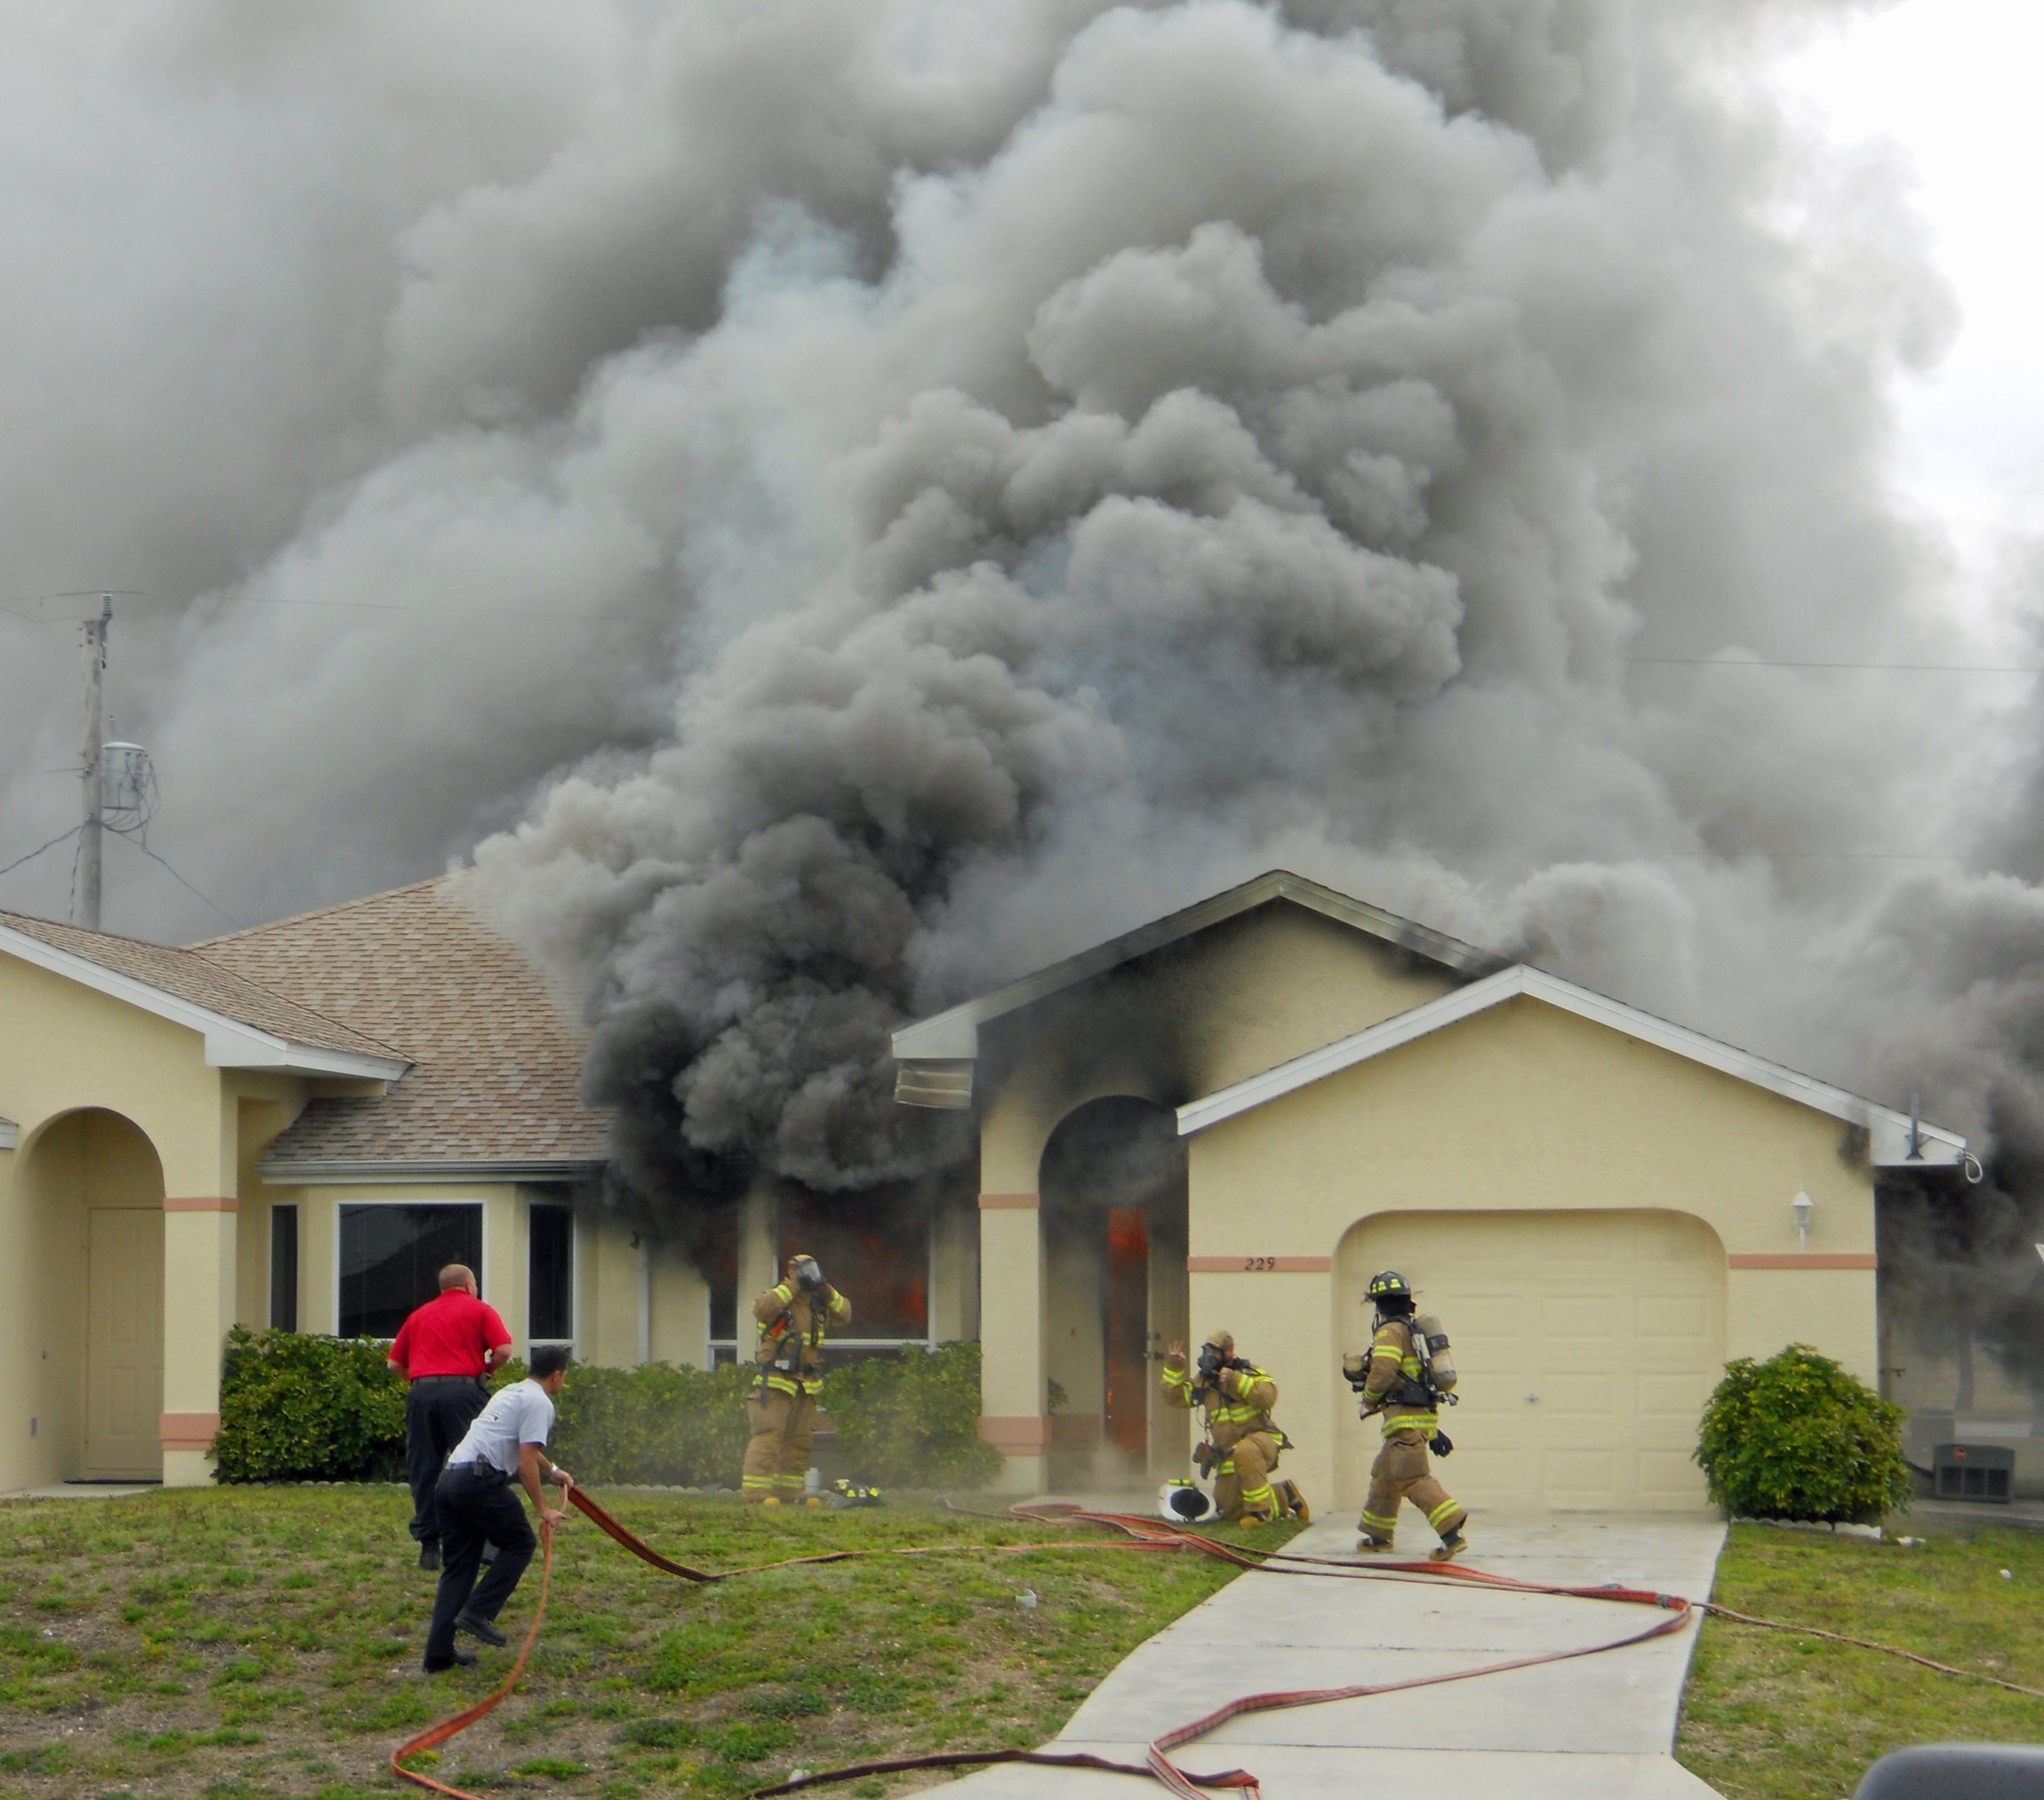
Firefighters preparing to enter a house fire. What is your Game Plan?  The scenario is posted below and comment in the comment box beneath the post.

You are the officer of the first due engine dispatched to a residential structure fire at 1300 hours.  The initial response is 3 Engines, 1 Ladder and 1 Battalion; each of the Engines are staffed with 3 and the ladder is staffed with 4.  Your second due engine is 5 minutes out.  Each engine carries 1000 gallons of water and has a 1500 GPM pump.  The hydrant is 500 feet away and will deliver 1000 GPM.  Here are the specific questions to answer in the comment section below:

#1) Will you lay in your own supply or does your department typically utilize the second due for this?

#2) What size/length attack line(s) will you stretch?

#3) What type of ventilation will you use, who will perform this function and when?

#4) Will you perform a Primary Search and if so who will perform this function?

#5) Do you see anything interesting about the construction of this structure?

Feel free to elaborate on the way you would attack this fire and any department SOP/SOGs that determine your tactics.